How to Memorize the Guitar Fretboard
Published on January 14, 2026
If the guitar fretboard feels confusing, you’re not alone. Six strings, dozens of notes, and multiple octaves can look impossible to “memorize.”
Here’s the good news: you don’t need superhuman memory—and you don’t need to memorize everything at once. What you really need is a small set of simple patterns that repeat across the neck.
This guide walks you through those patterns step-by-step. You’ll build strong visual anchors, connect notes across strings, and use short daily practice to make the fretboard feel intuitive instead of intimidating.
Why Memorizing the Fretboard Matters
Even if you can already play chords or a few riffs, knowing the fretboard unlocks a whole new level of freedom:
- You learn songs faster.
- You improvise with confidence.
- You understand how scales and chords connect.
- You move shapes anywhere on the neck.
- You stop depending only on patterns and start creating.
Think of it like learning a computer keyboard: at first you look down for every key… but eventually it becomes second nature. The fretboard works the same way.
Start with the Natural Notes on the Low E and A Strings
You do not need to memorize all six strings at once. Start with just two: the Low E (6th string) and A (5th string). These are your “root string highways”—most chord shapes, scale shapes, and interval patterns reference them.
The Natural Notes (No Sharps/Flats Yet)
Natural notes on the Low E (6th string):
E – F – G – A – B – C – D – E (repeats at the 12th fret)
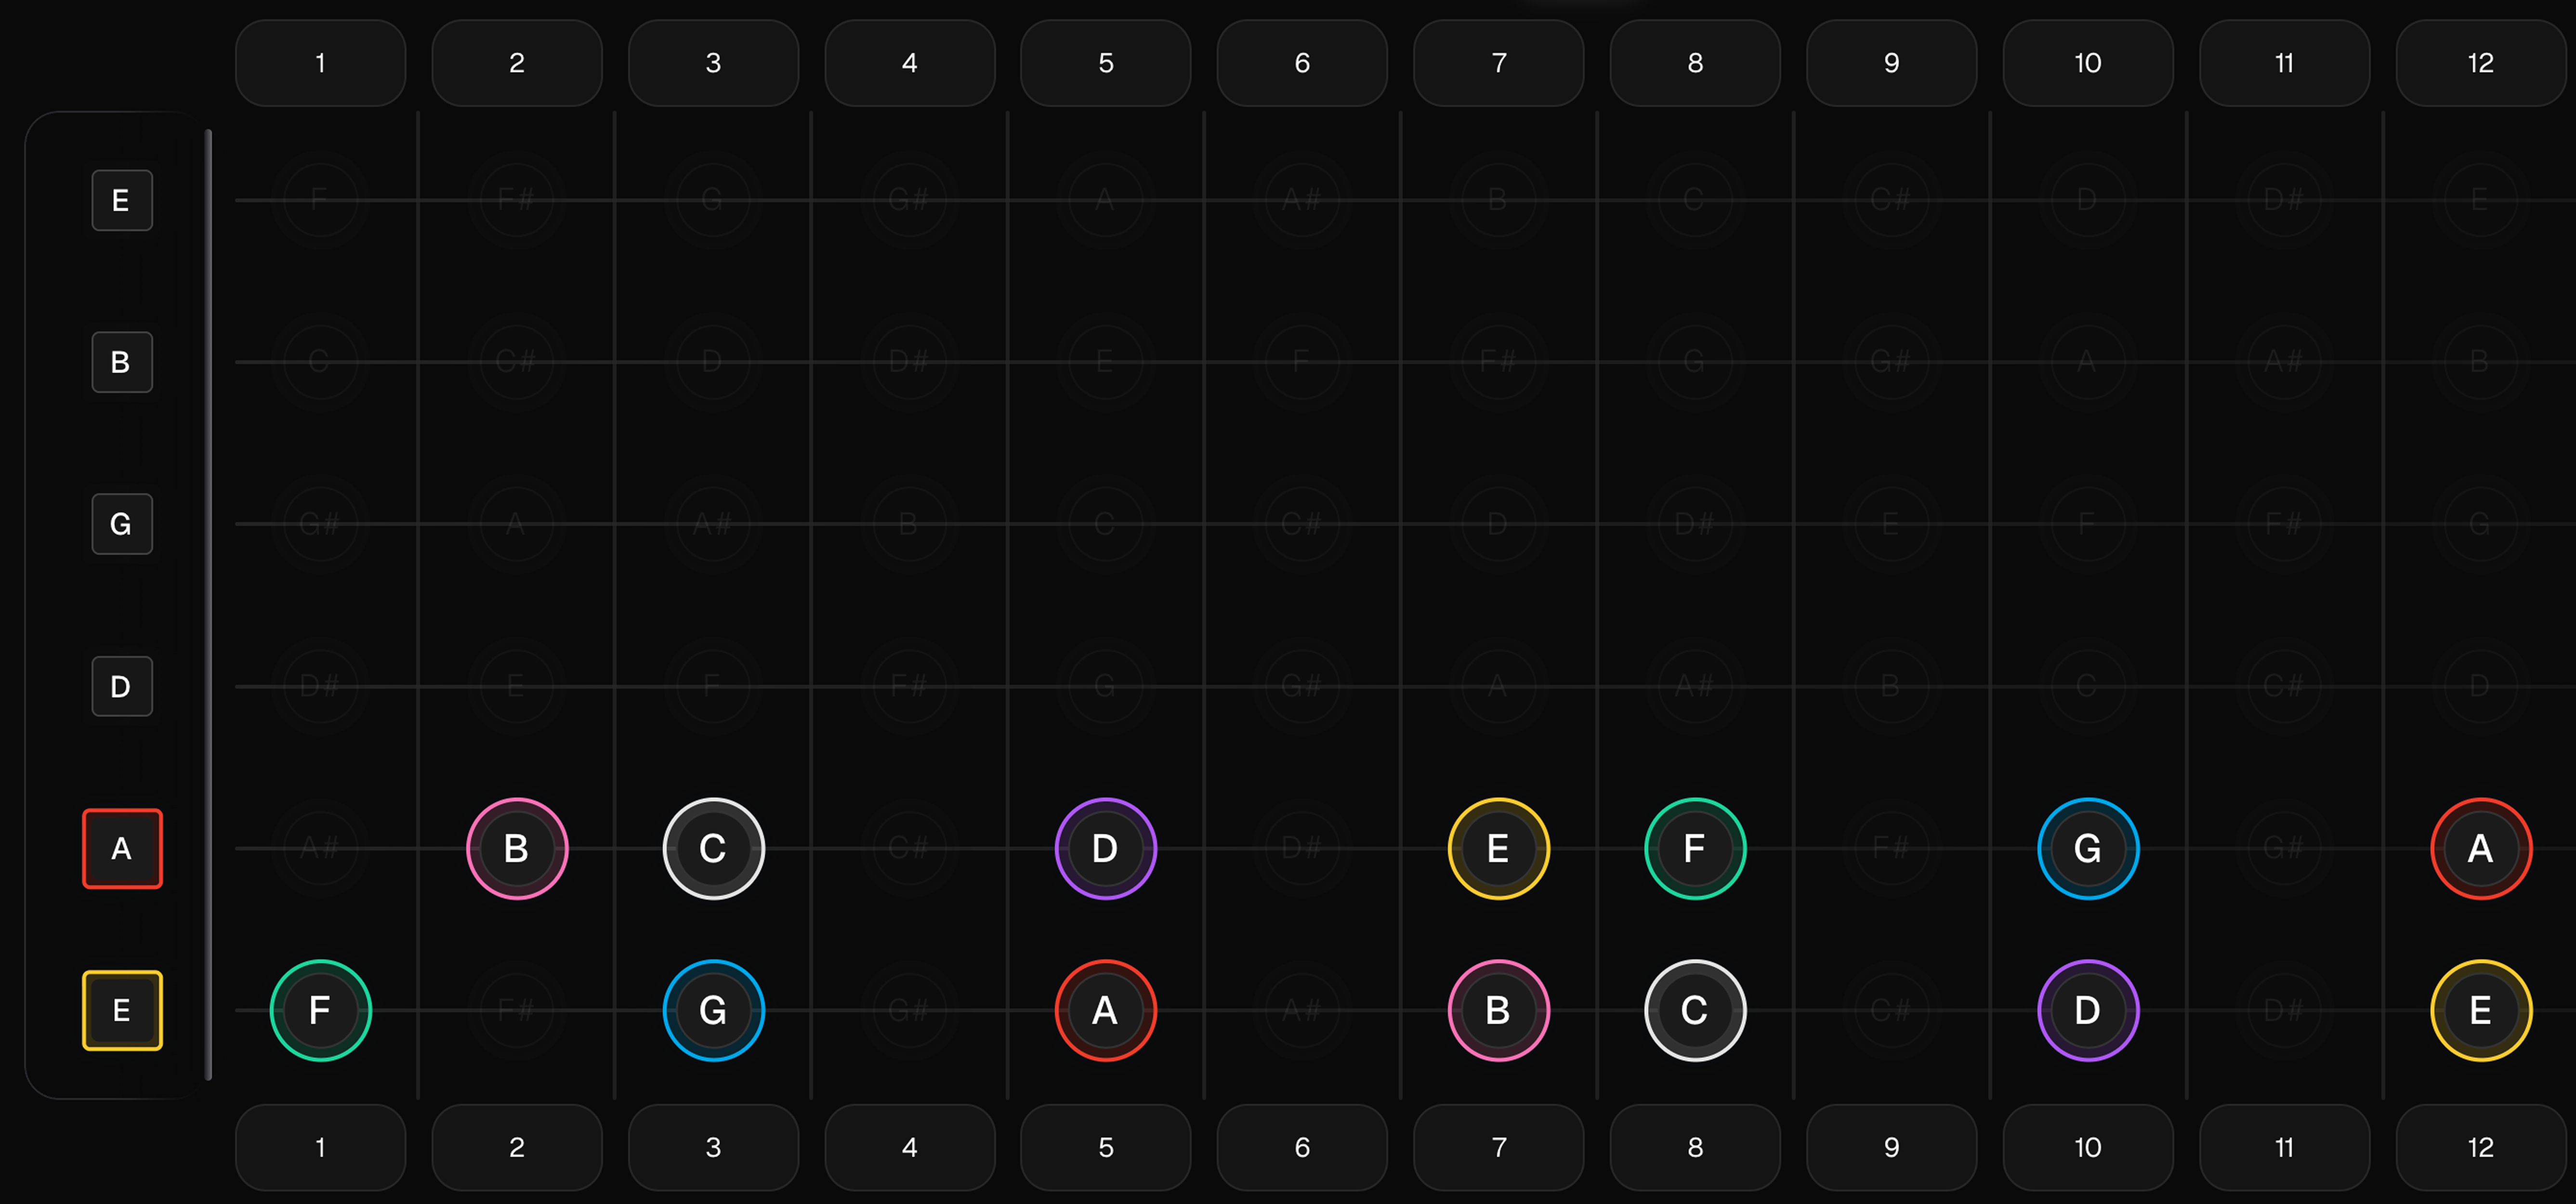
Natural notes on the A (5th string):
A – B – C – D – E – F – G – A (repeats at the 12th fret)
Treat these two strings as home base. Once you know them, the rest of the neck becomes much easier to decode.
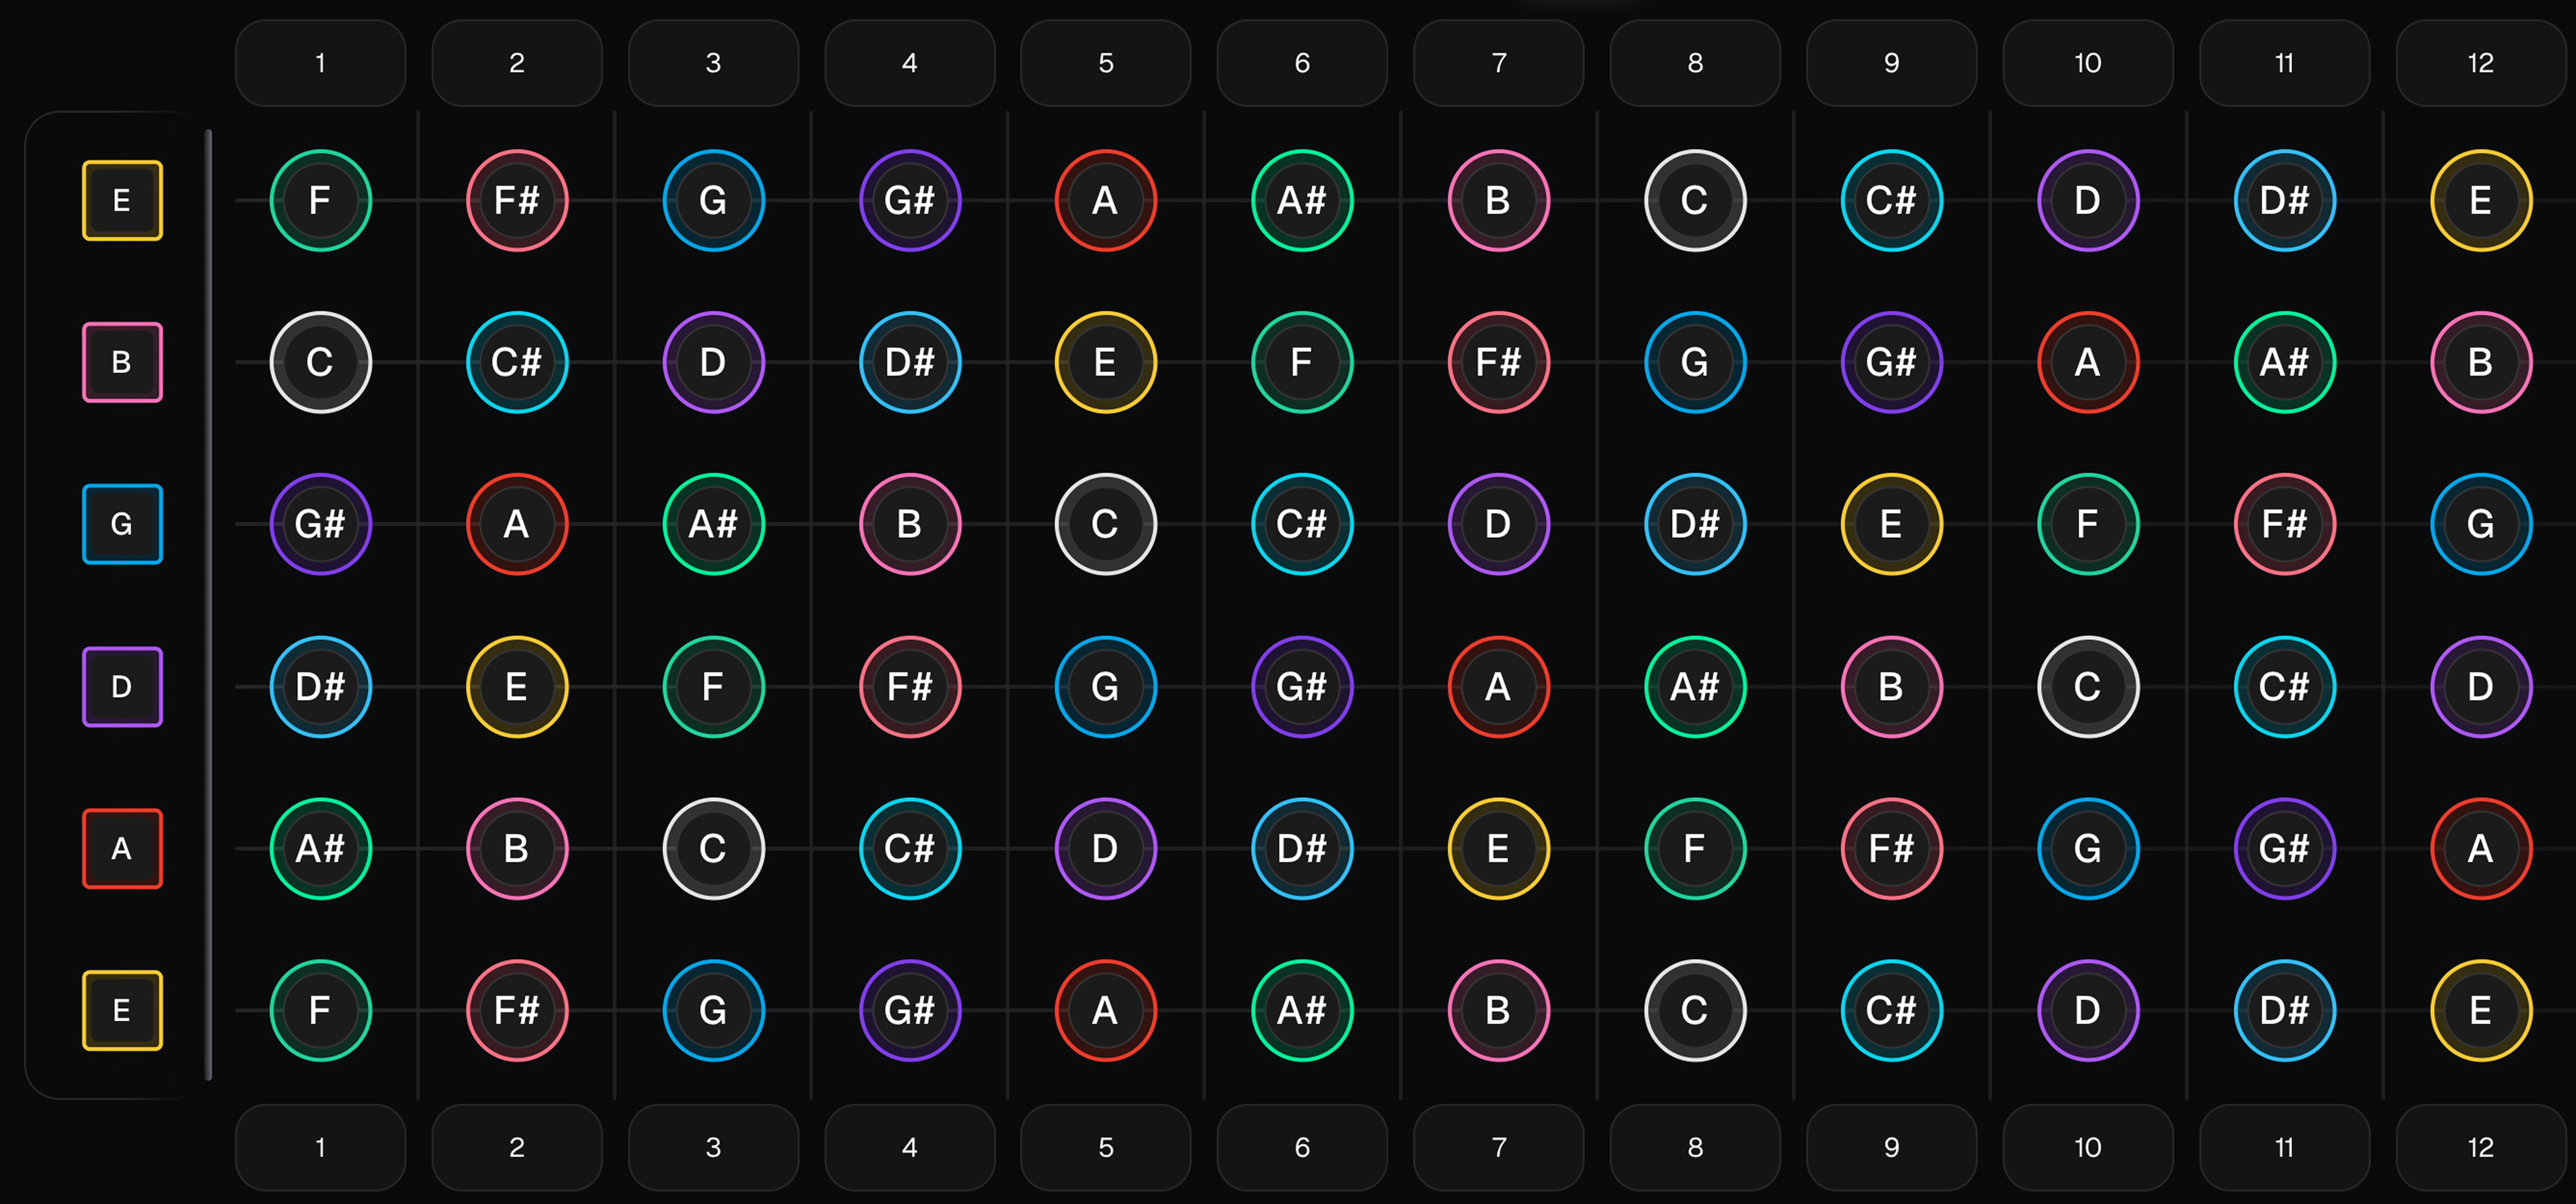
Add the Chromatic Scale
Instead of memorizing dozens of notes randomly, learn the chromatic sequence (every fret = one half-step):
A – A# – B – C – C# – D – D# – E – F – F# – G – G# – A
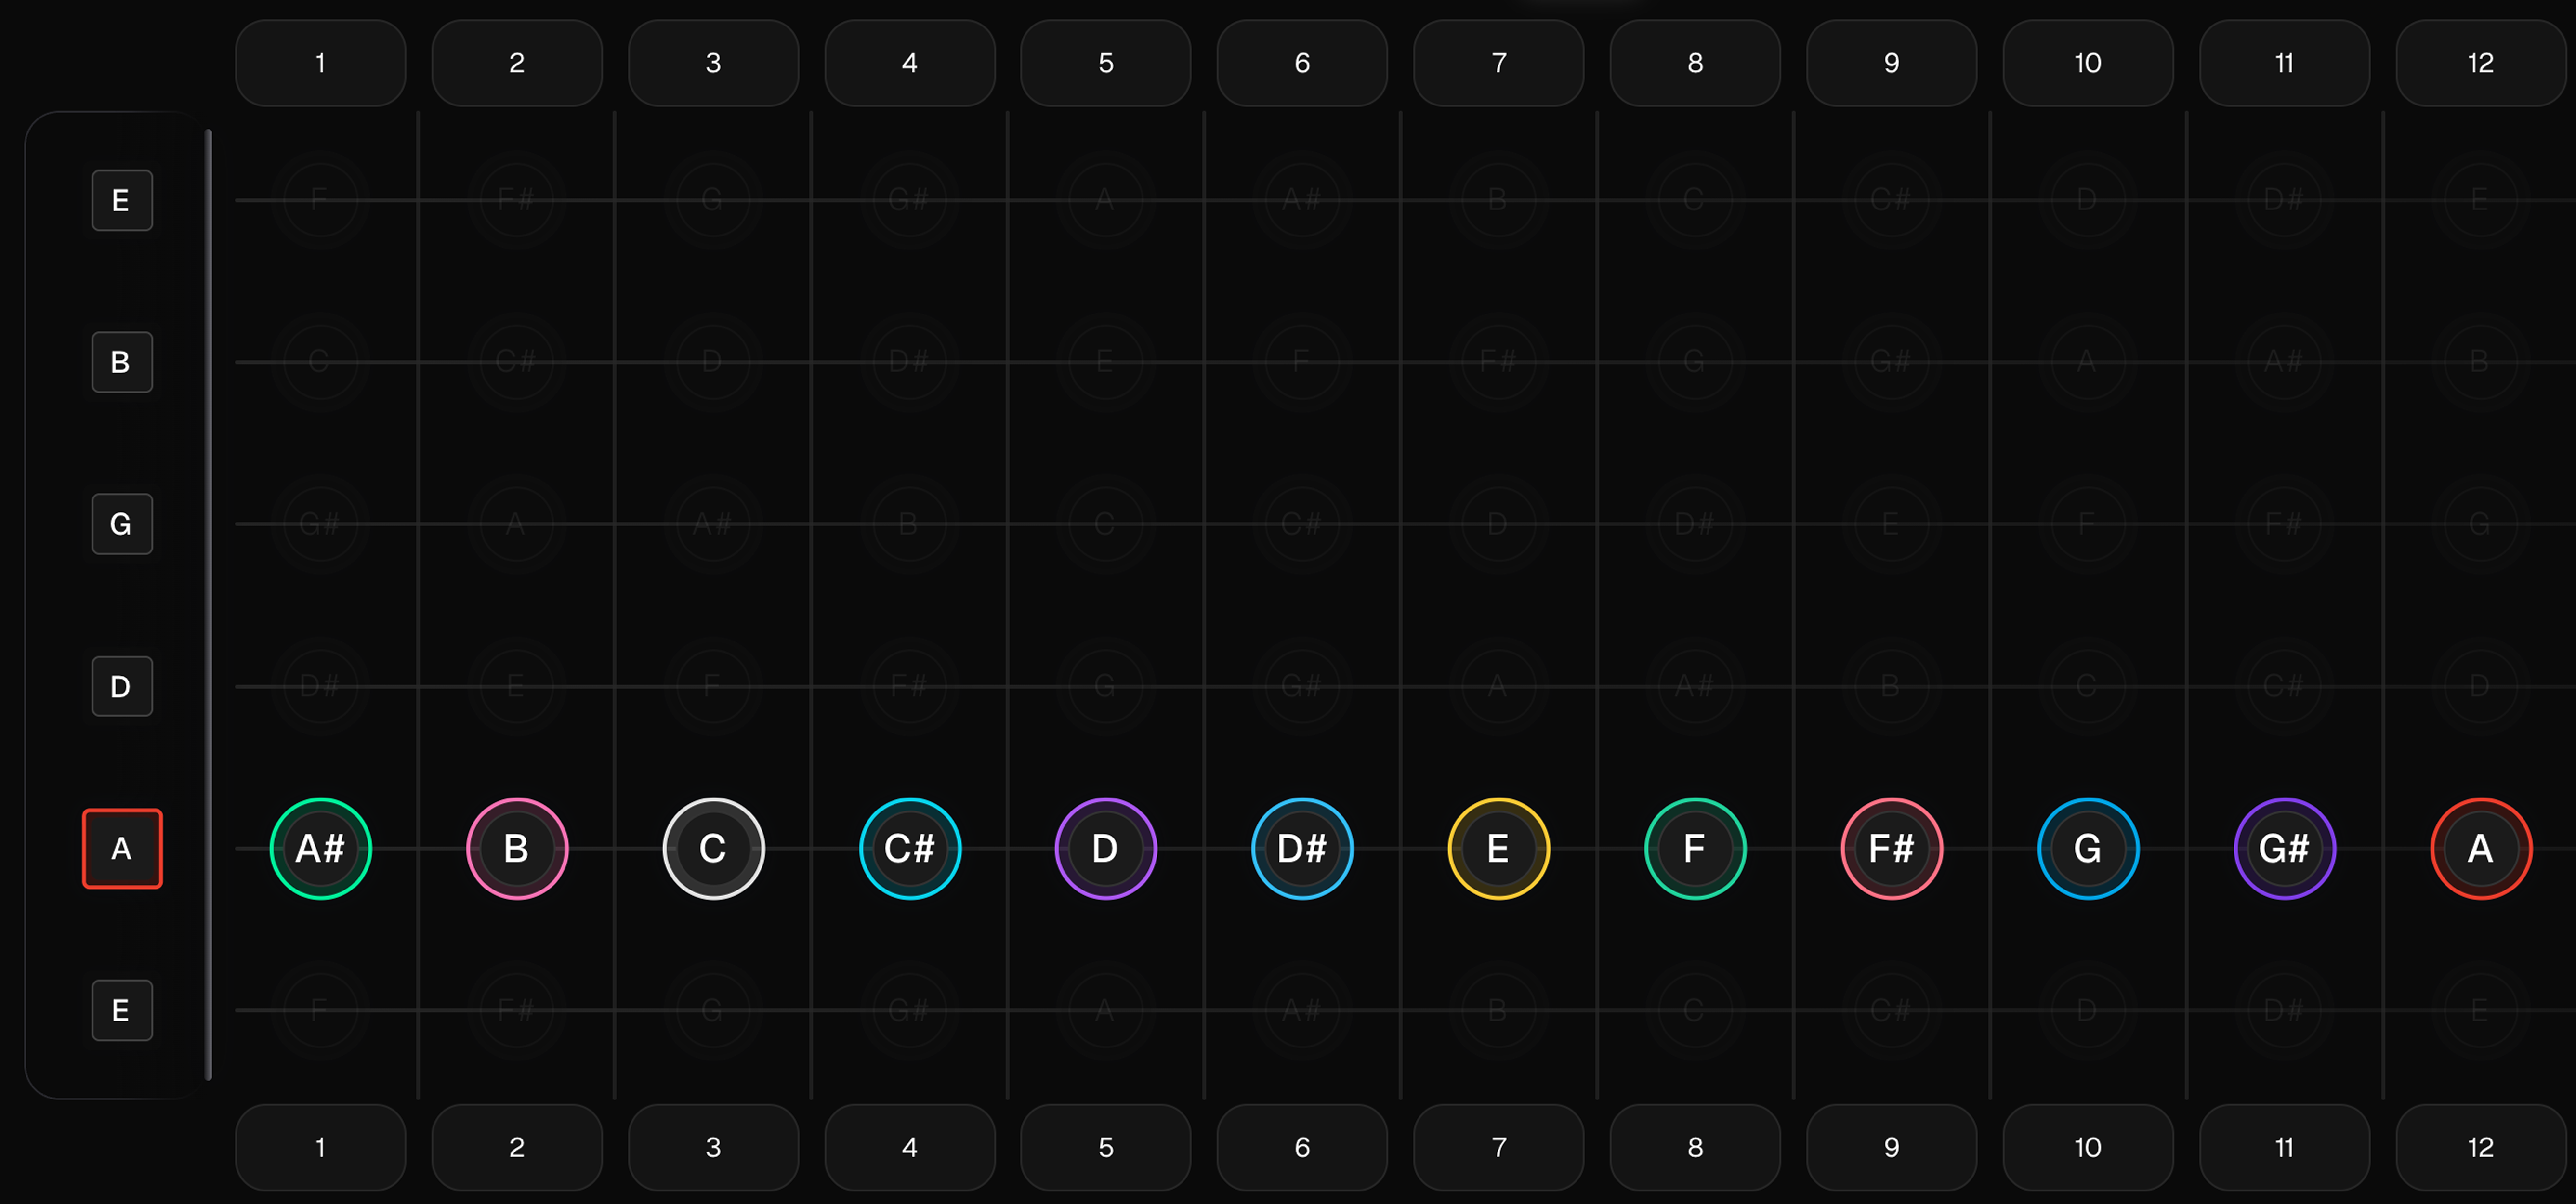
- Between B–C and E–F, there’s no sharp/flat (it’s already a half-step).
- Every fret is a half-step.
Example: you know the A string 3rd fret is C. The next fret is C#. Two frets higher is D.
Daily 2-Minute Drill
- Start on open E and go up to the 12th fret, naming each note out loud.
- Then go back down from the 12th fret to open E.
- Repeat the same ascending and descending drill on the A string.
Don’t worry about speed—consistency beats intensity.
Master the 5 Fretboard Landmarks
These frets act like checkpoints that anchor your mental map:
- 3rd fret
- 5th fret
- 7th fret
- 9th fret
- 12th fret (everything repeats from here)
Practice tip: pick a landmark (like the 7th fret) and play each note on that fret across all strings—name them as you go.
Learn the Octave Shapes
Octave shapes let you jump across the neck instantly. Once you see them, the fretboard stops feeling random—it becomes a grid of repeating patterns.
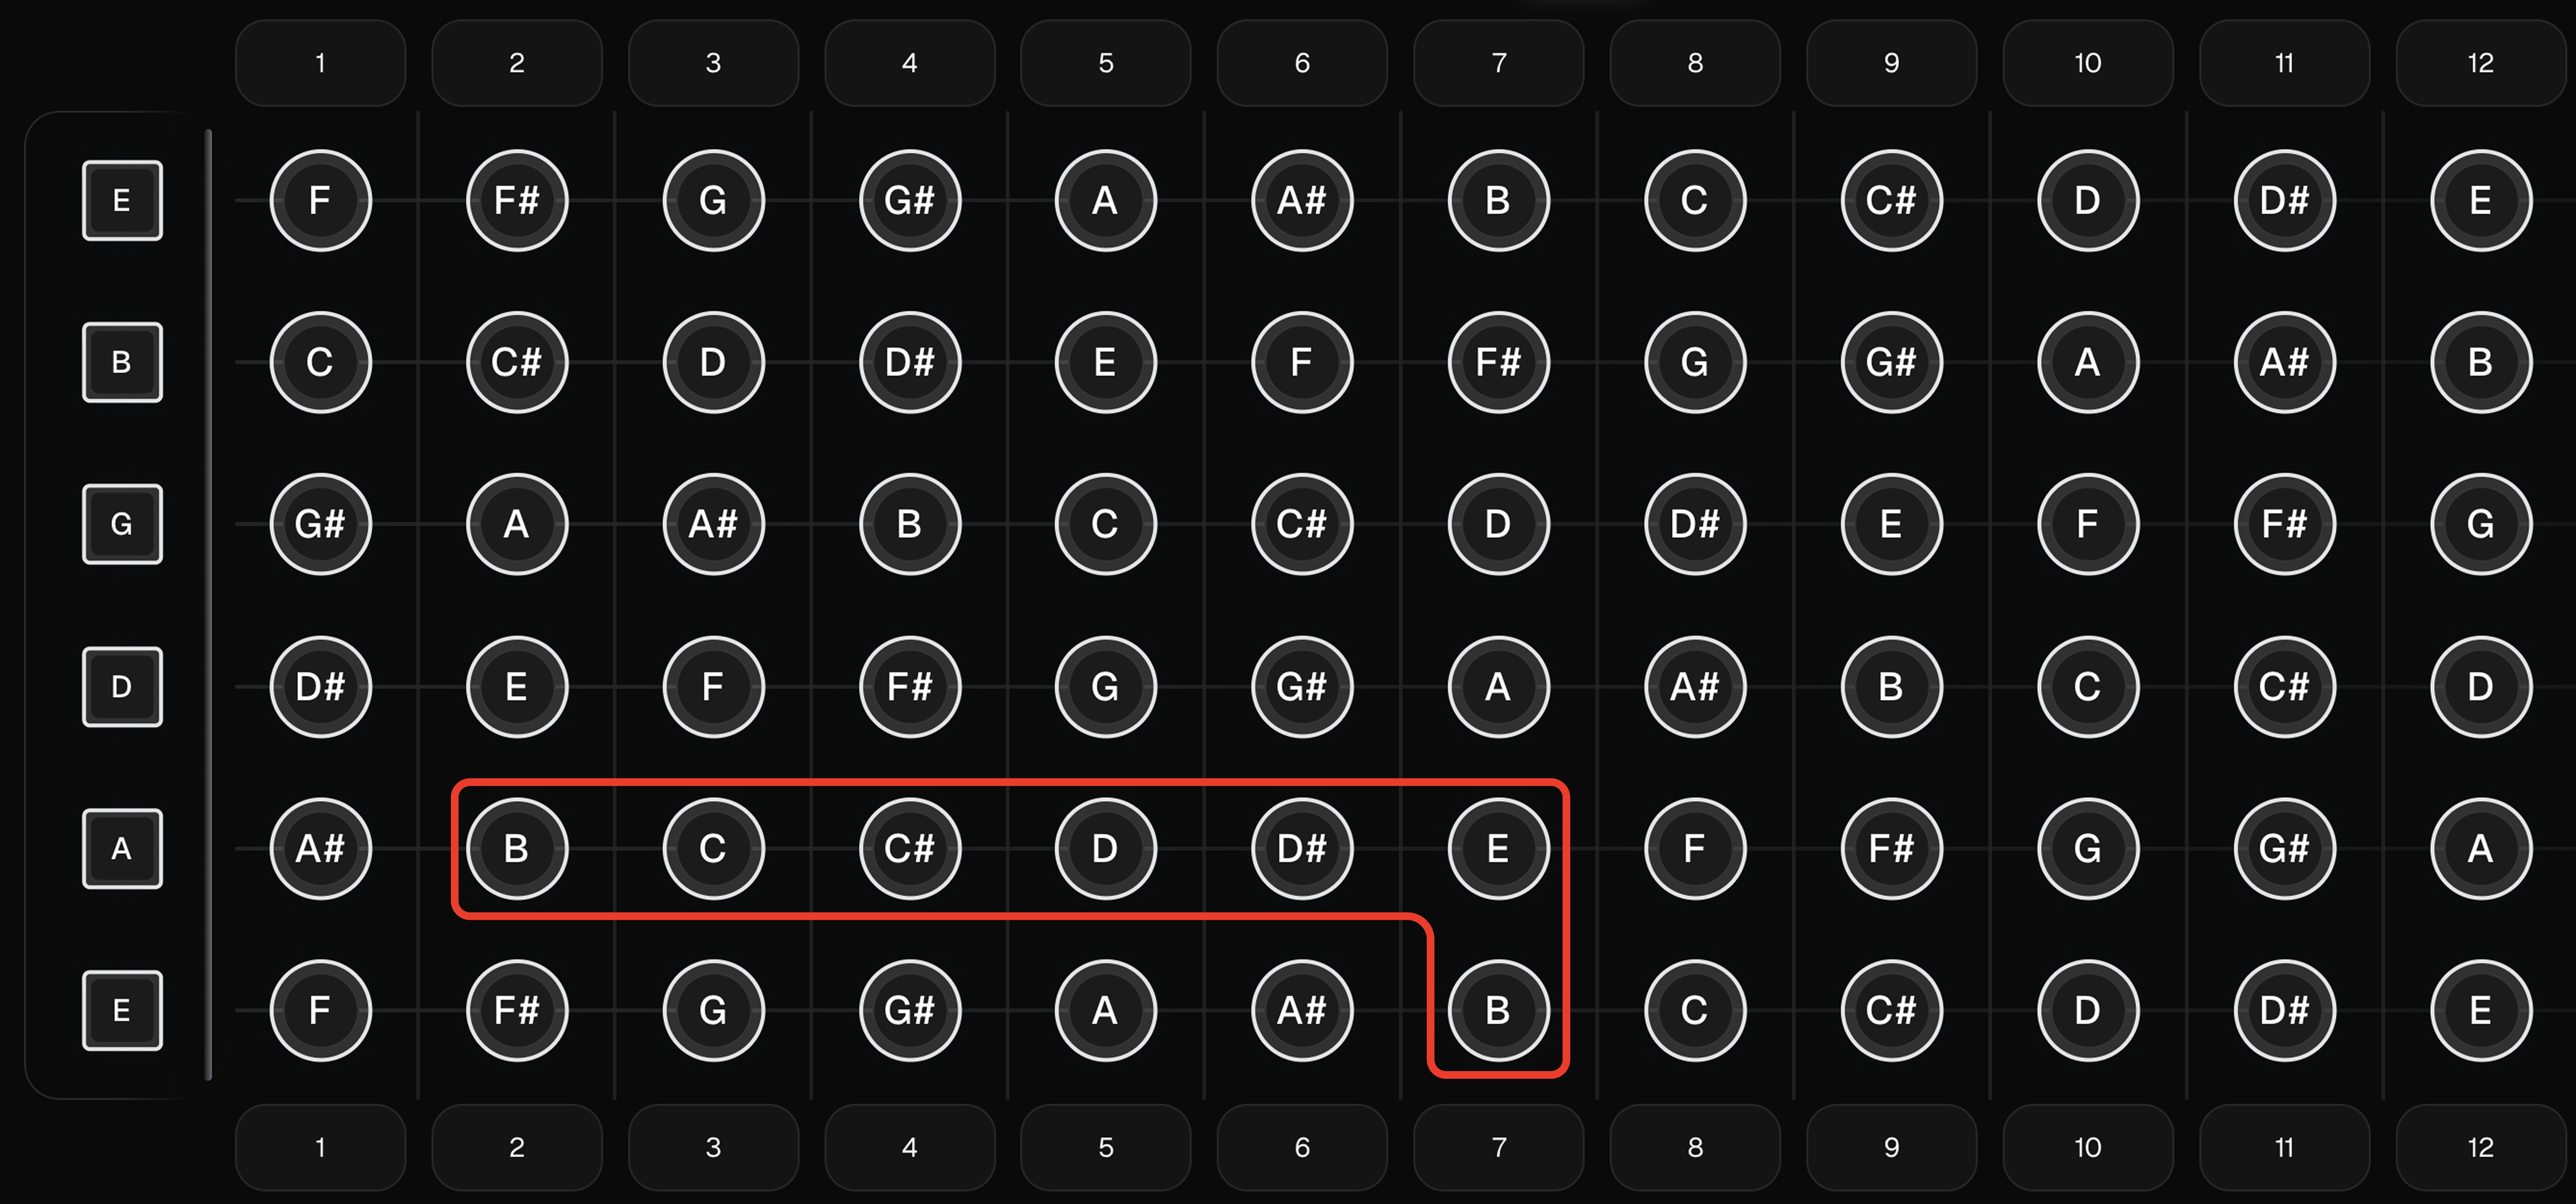
Find the Same Note on Another String
Most strings are tuned a perfect fourth apart. A practical shortcut: the same pitch class often appears 5 frets higher on the next string (except G → B, which is 4 frets).
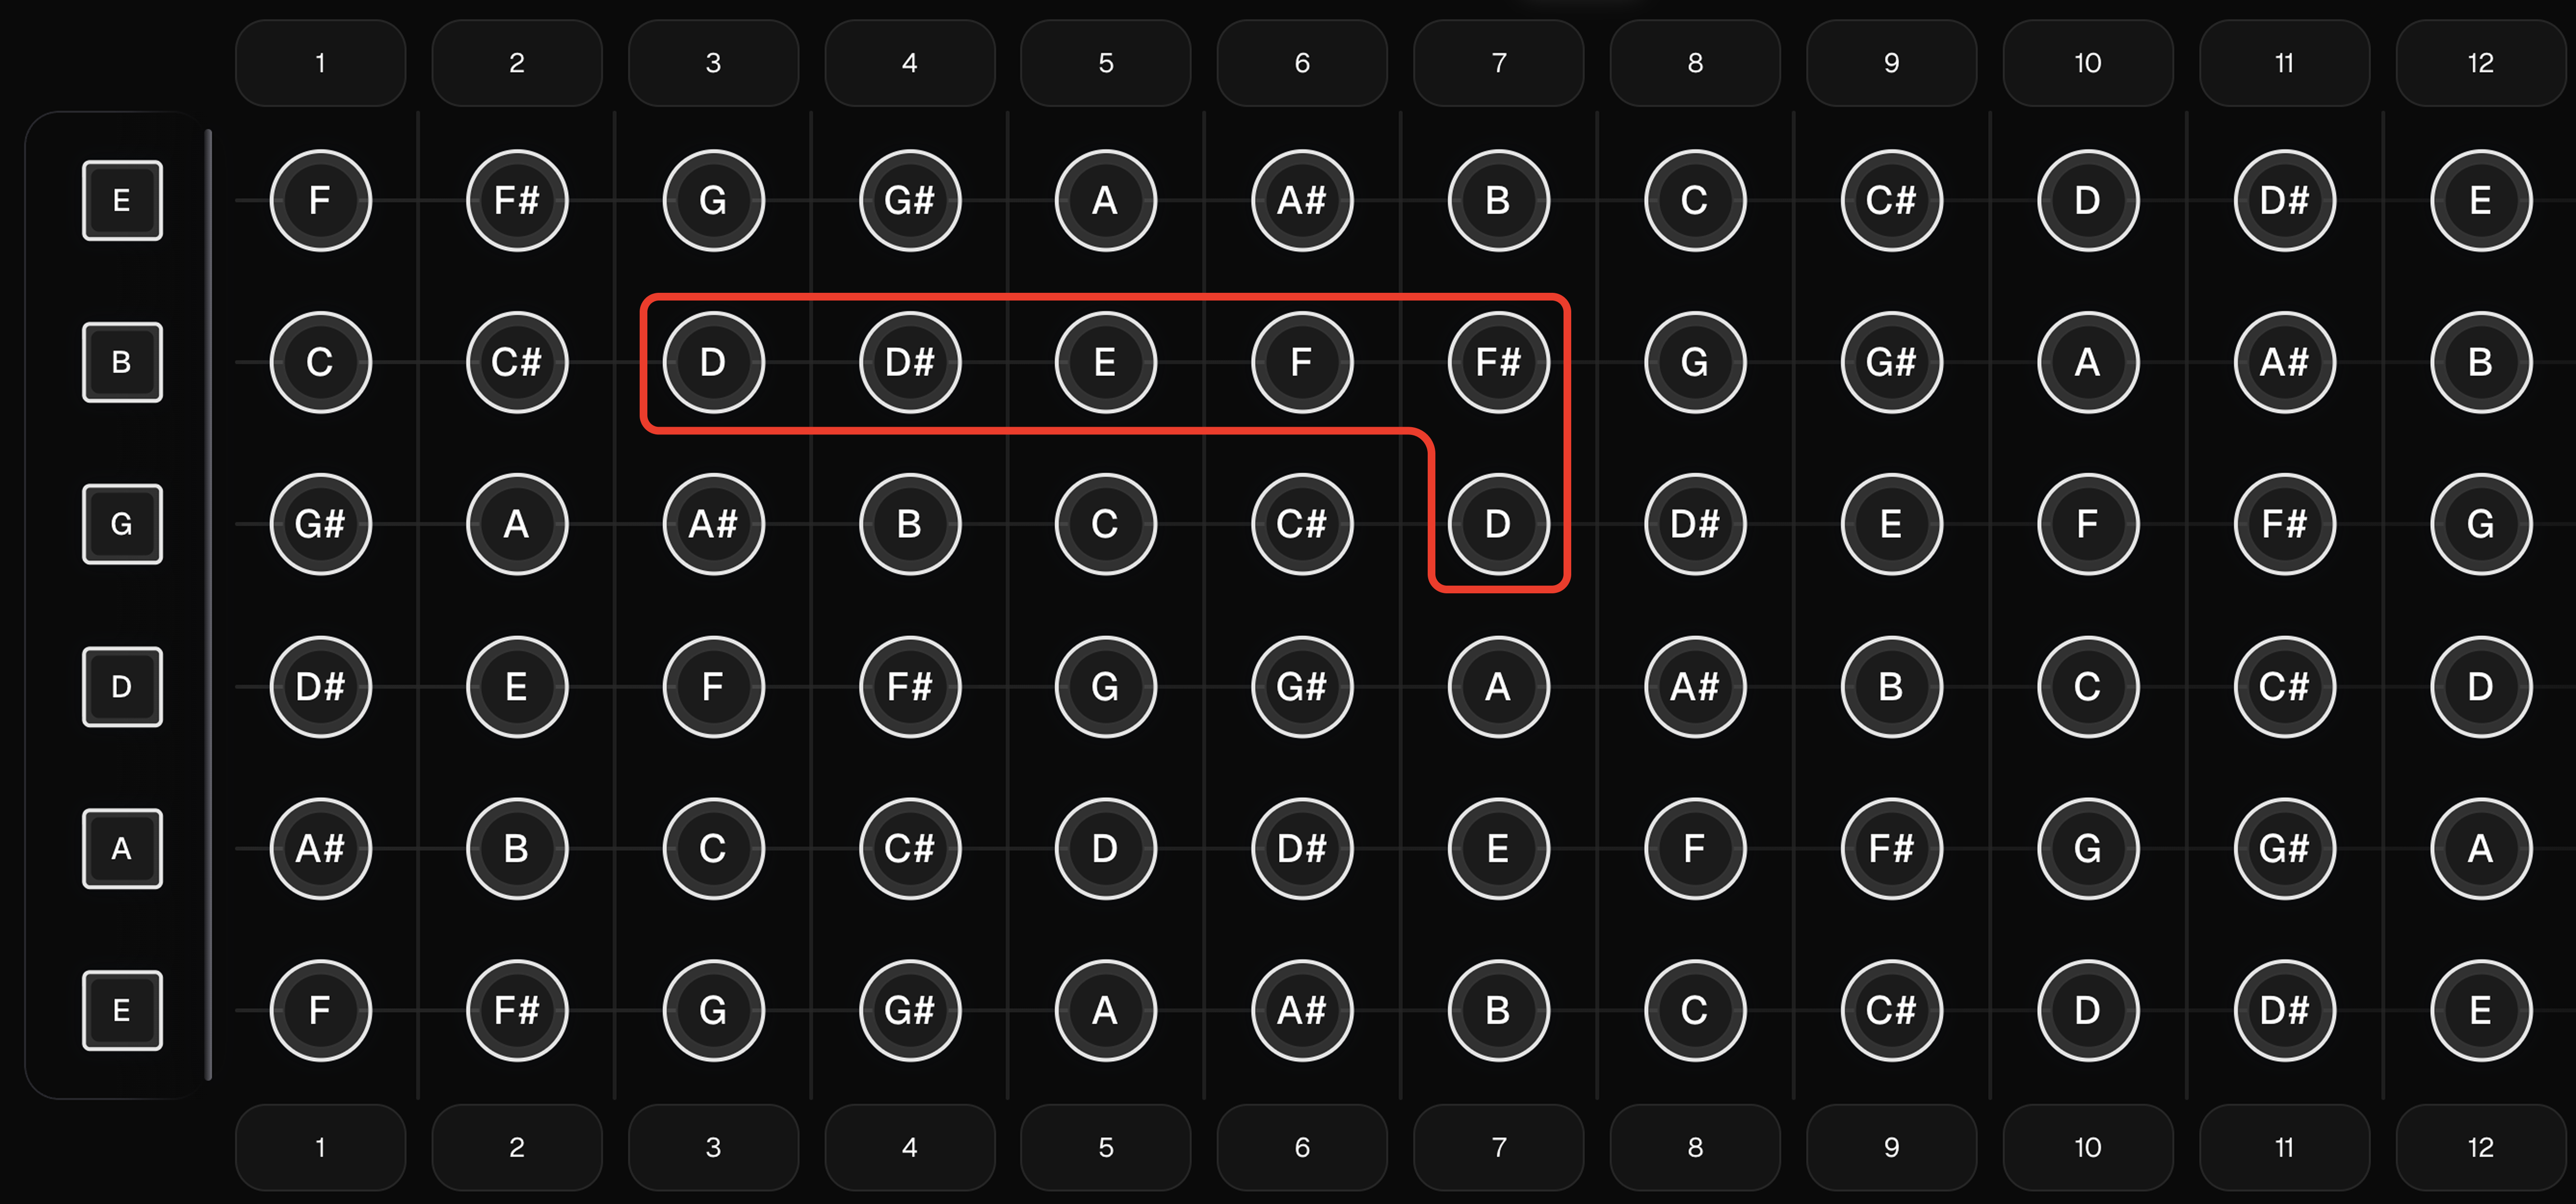
Example: Low E string 7th fret (B) → D string 2nd fret (B)
Example: G string 7th fret (D) → B string 3rd fret (D)
Find One Octave Higher
To find the same note one octave higher:
Move to the next string and go up +7 frets (except G → B, which is +8).
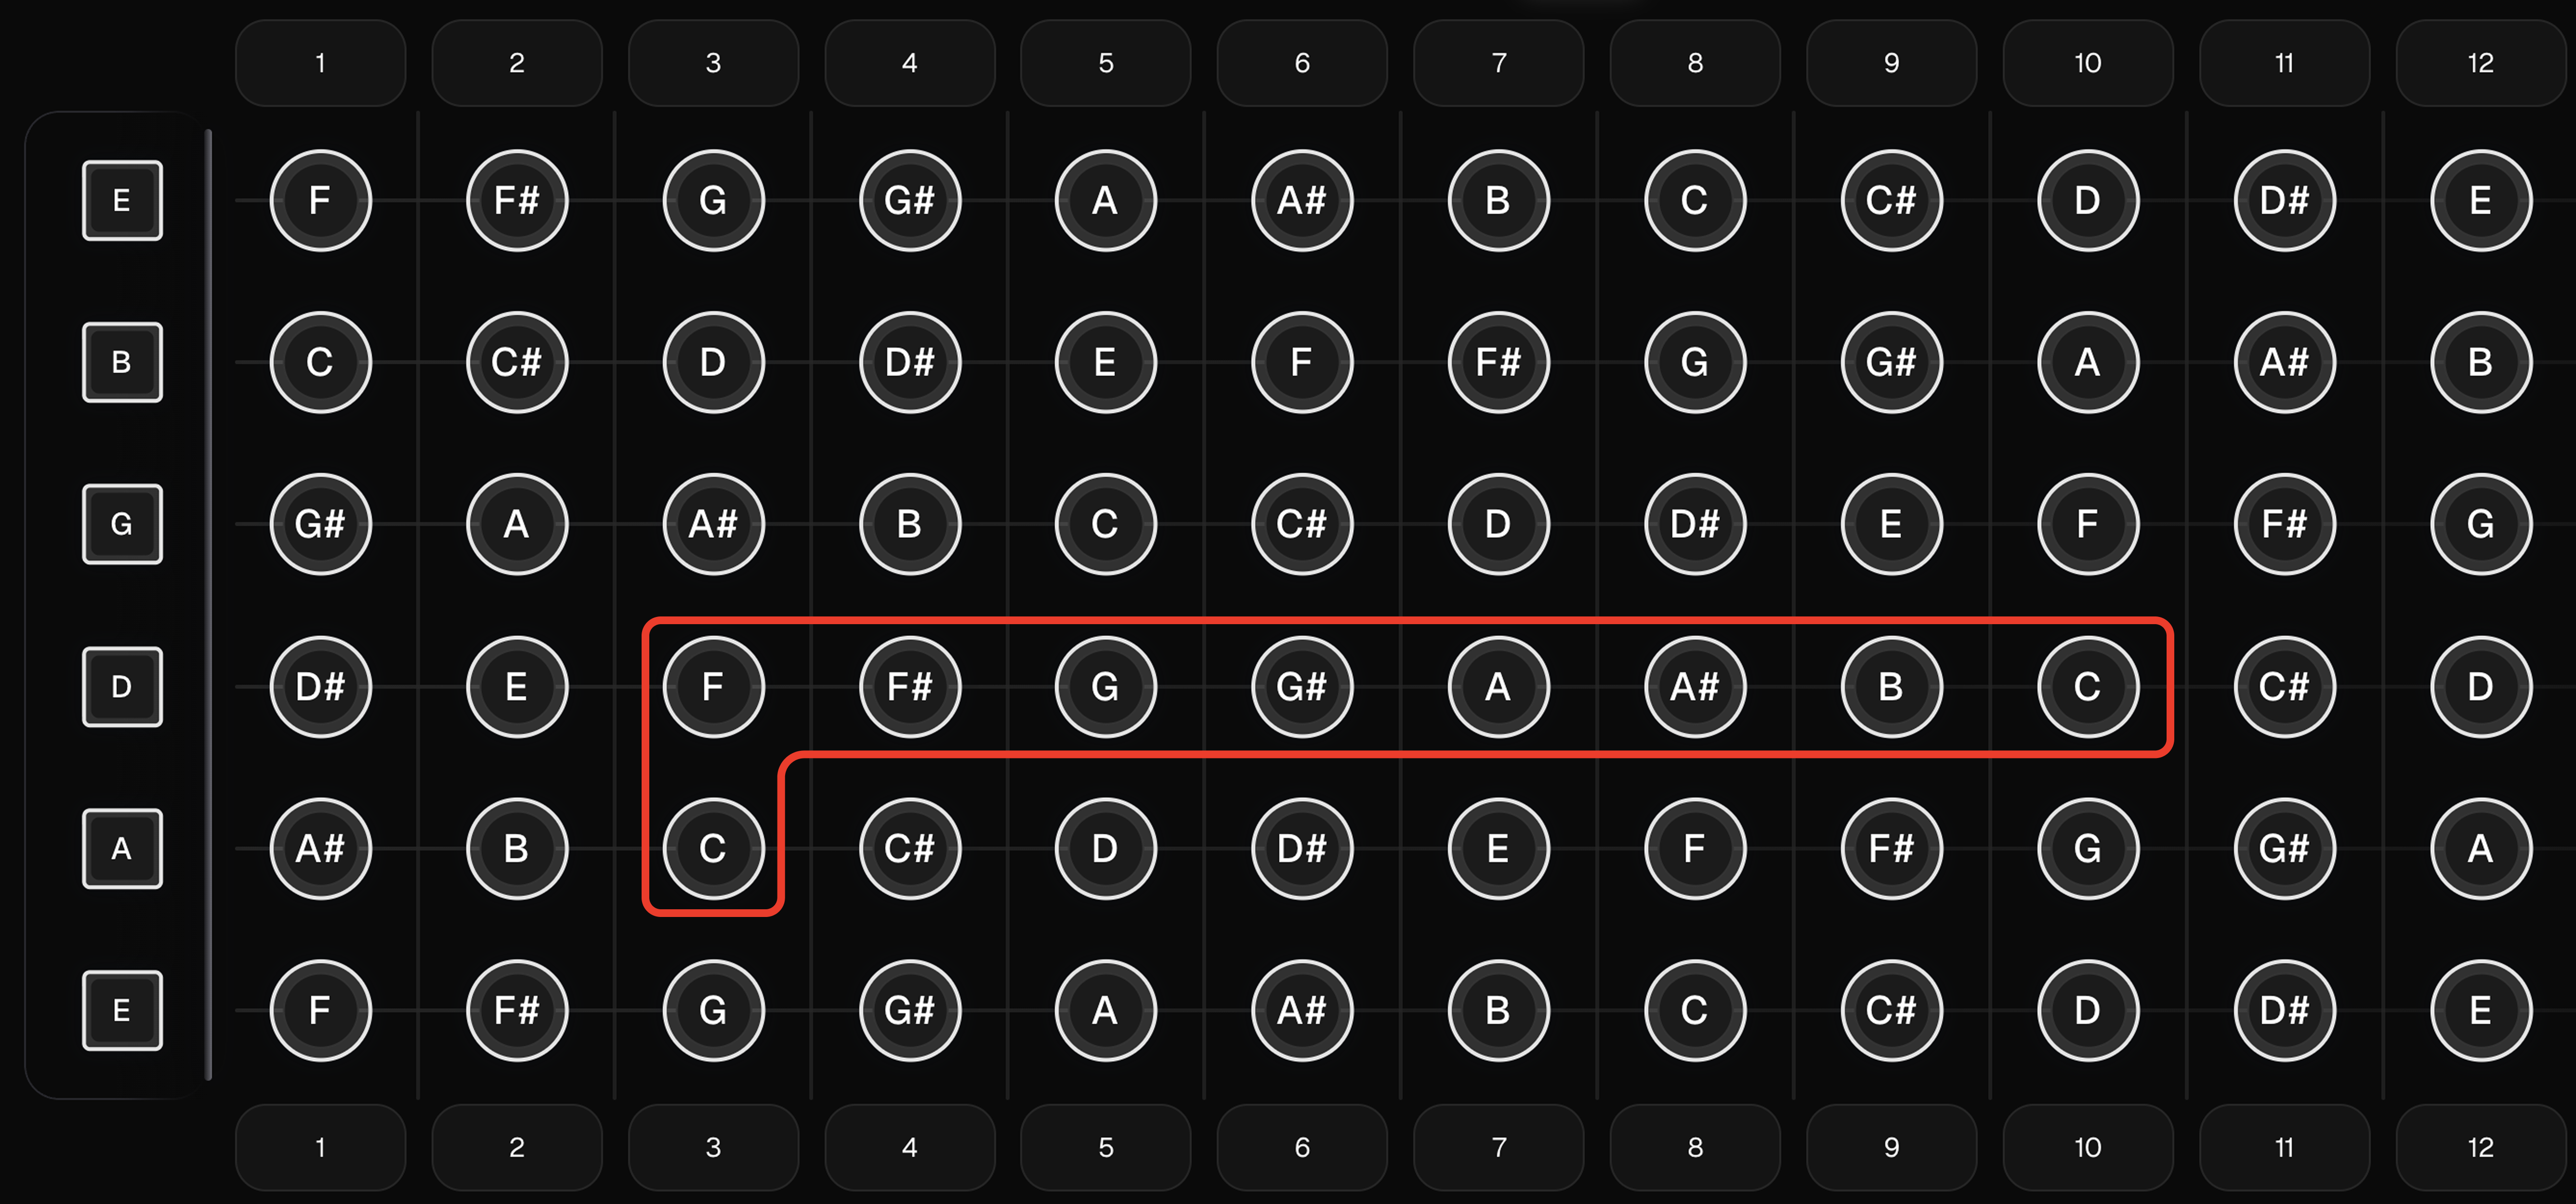
Example: A string 3rd fret (C) → D string 10th fret (C)
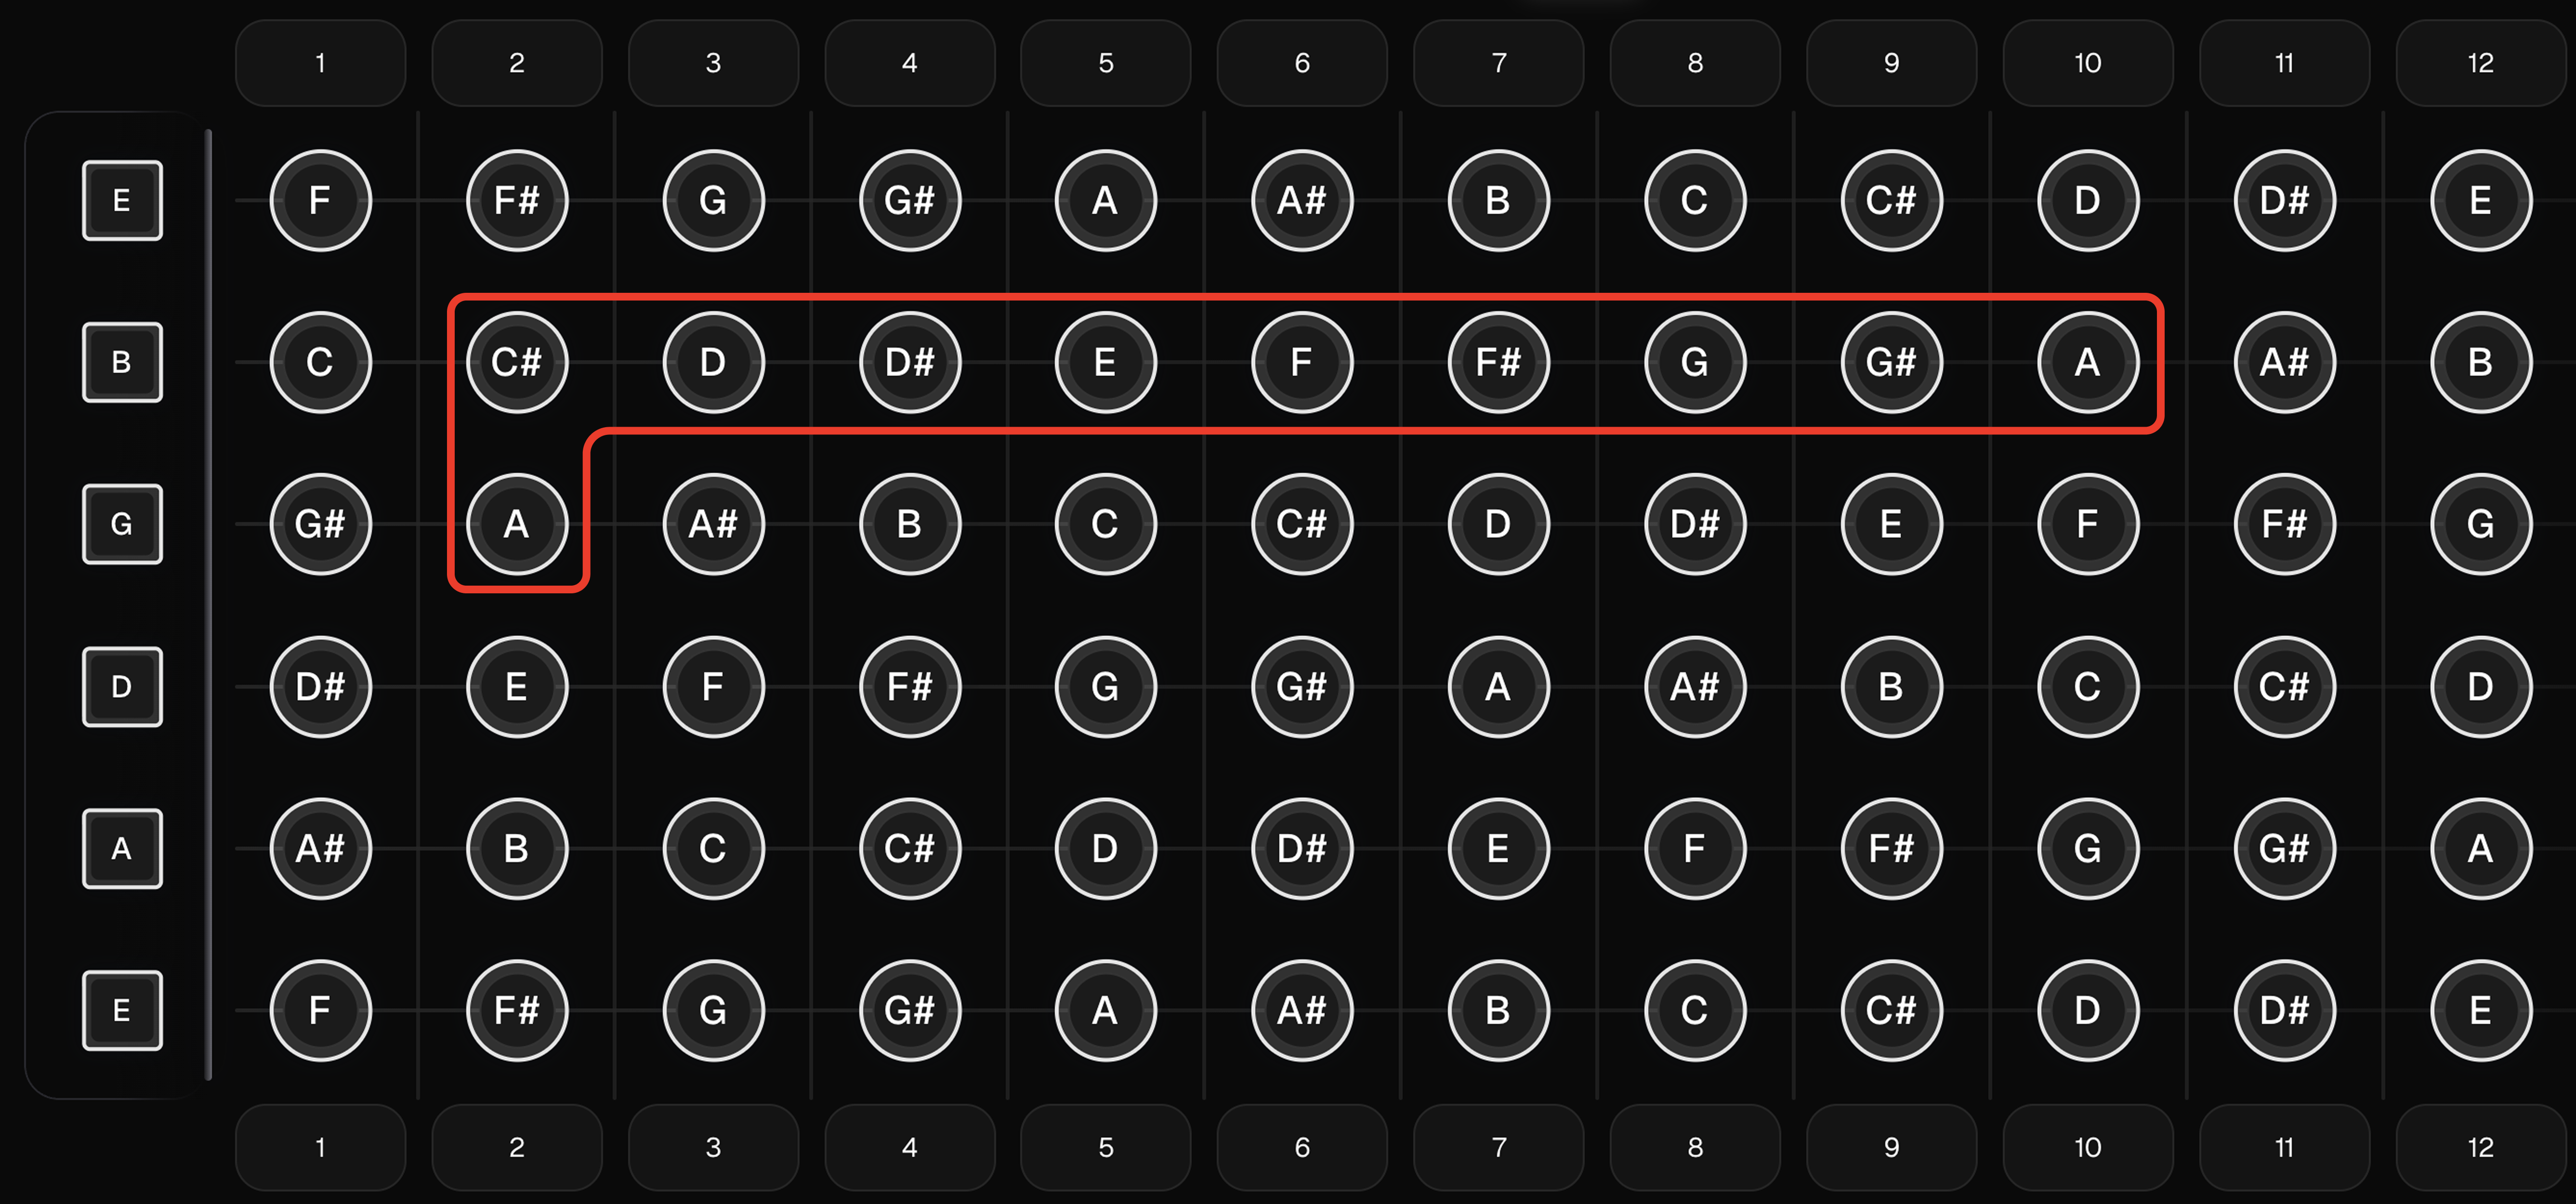
Example: G string 2nd fret (A) → B string 10th fret (A) (+8 because of G→B tuning)
The Core Octave Shapes
These four shapes are the backbone of fretboard visualization:
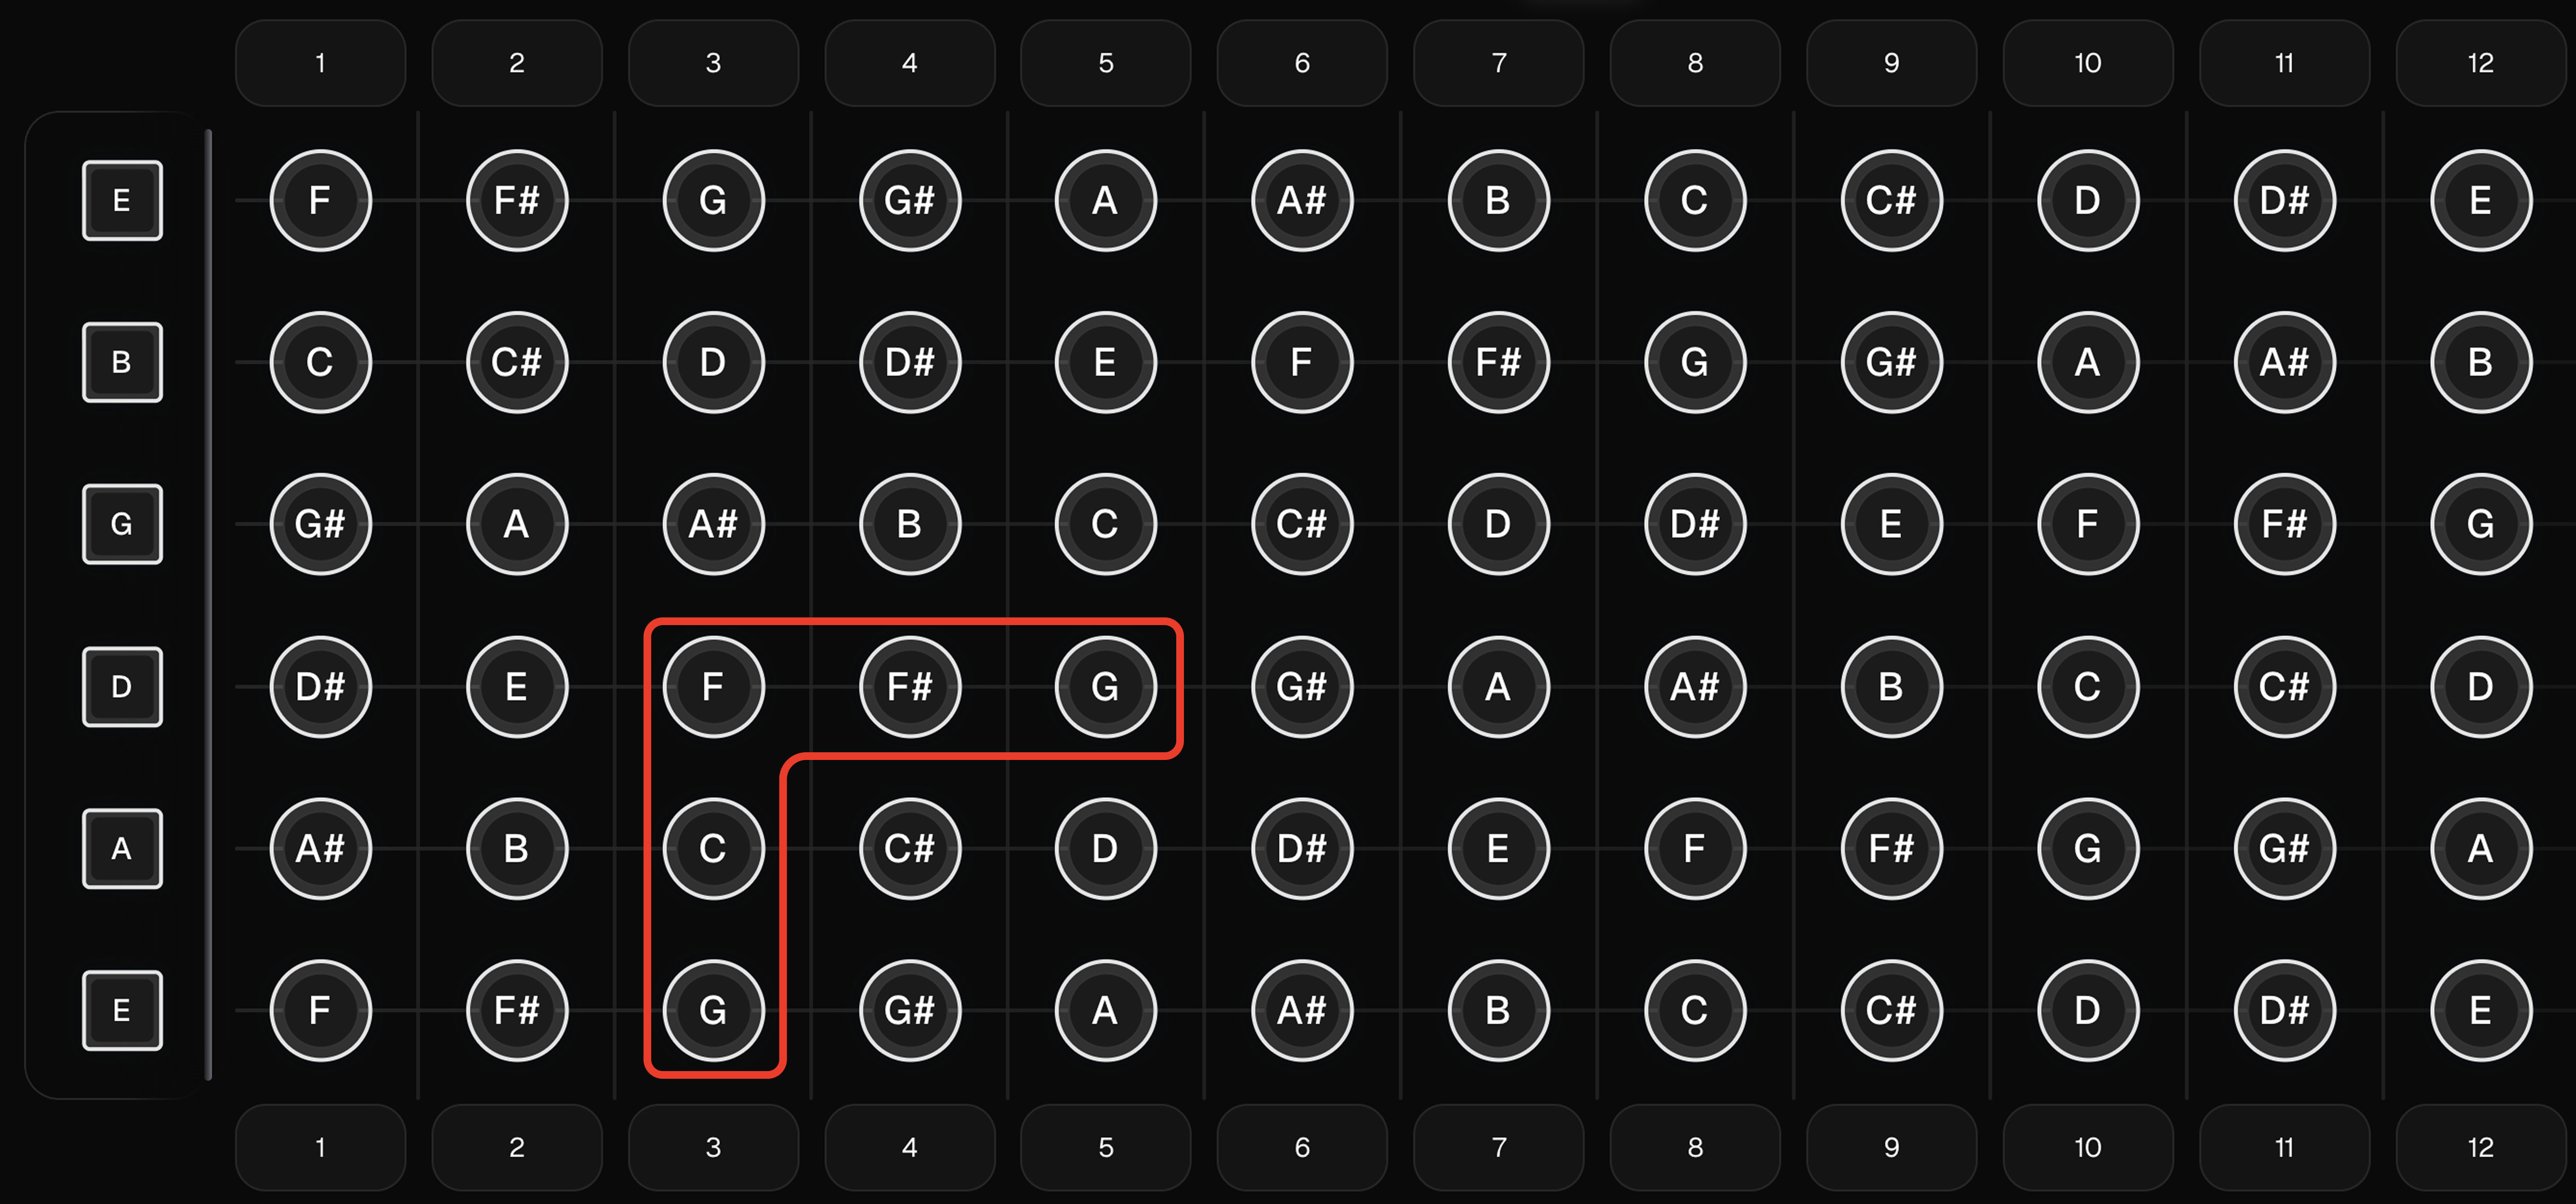
1) Low E → D String
Pattern: +2 frets, +2 strings. Example: 3rd fret Low E (G) → 5th fret D (G)
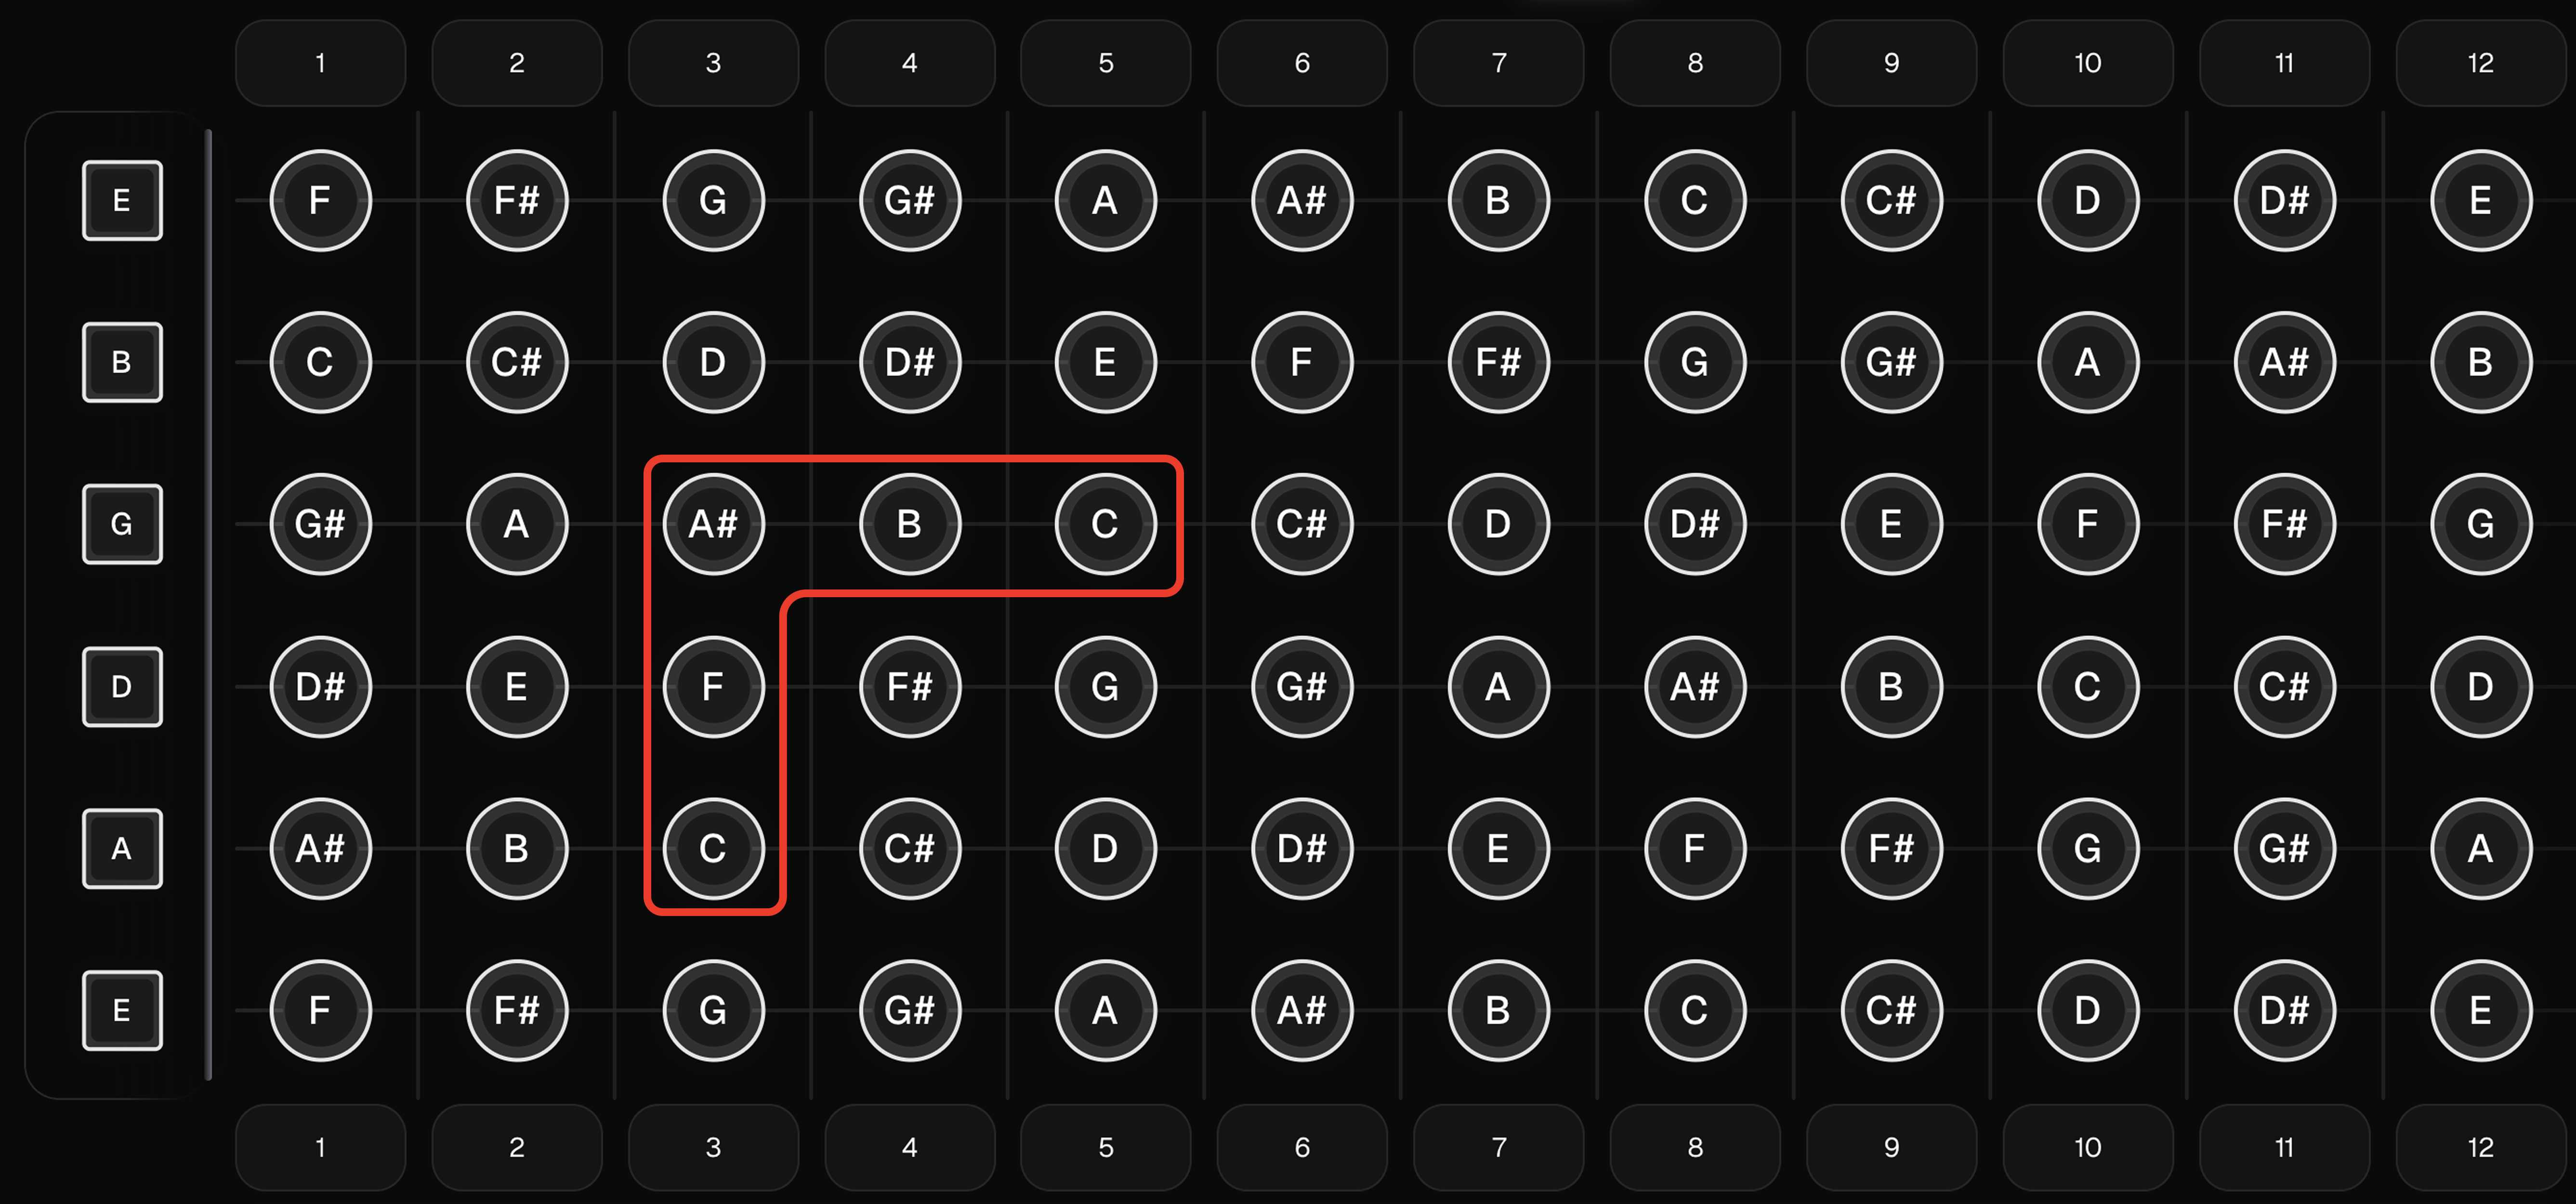
2) A → G String
Pattern: +2 frets, +2 strings. Example: 3rd fret A (C) → 5th fret G (C)
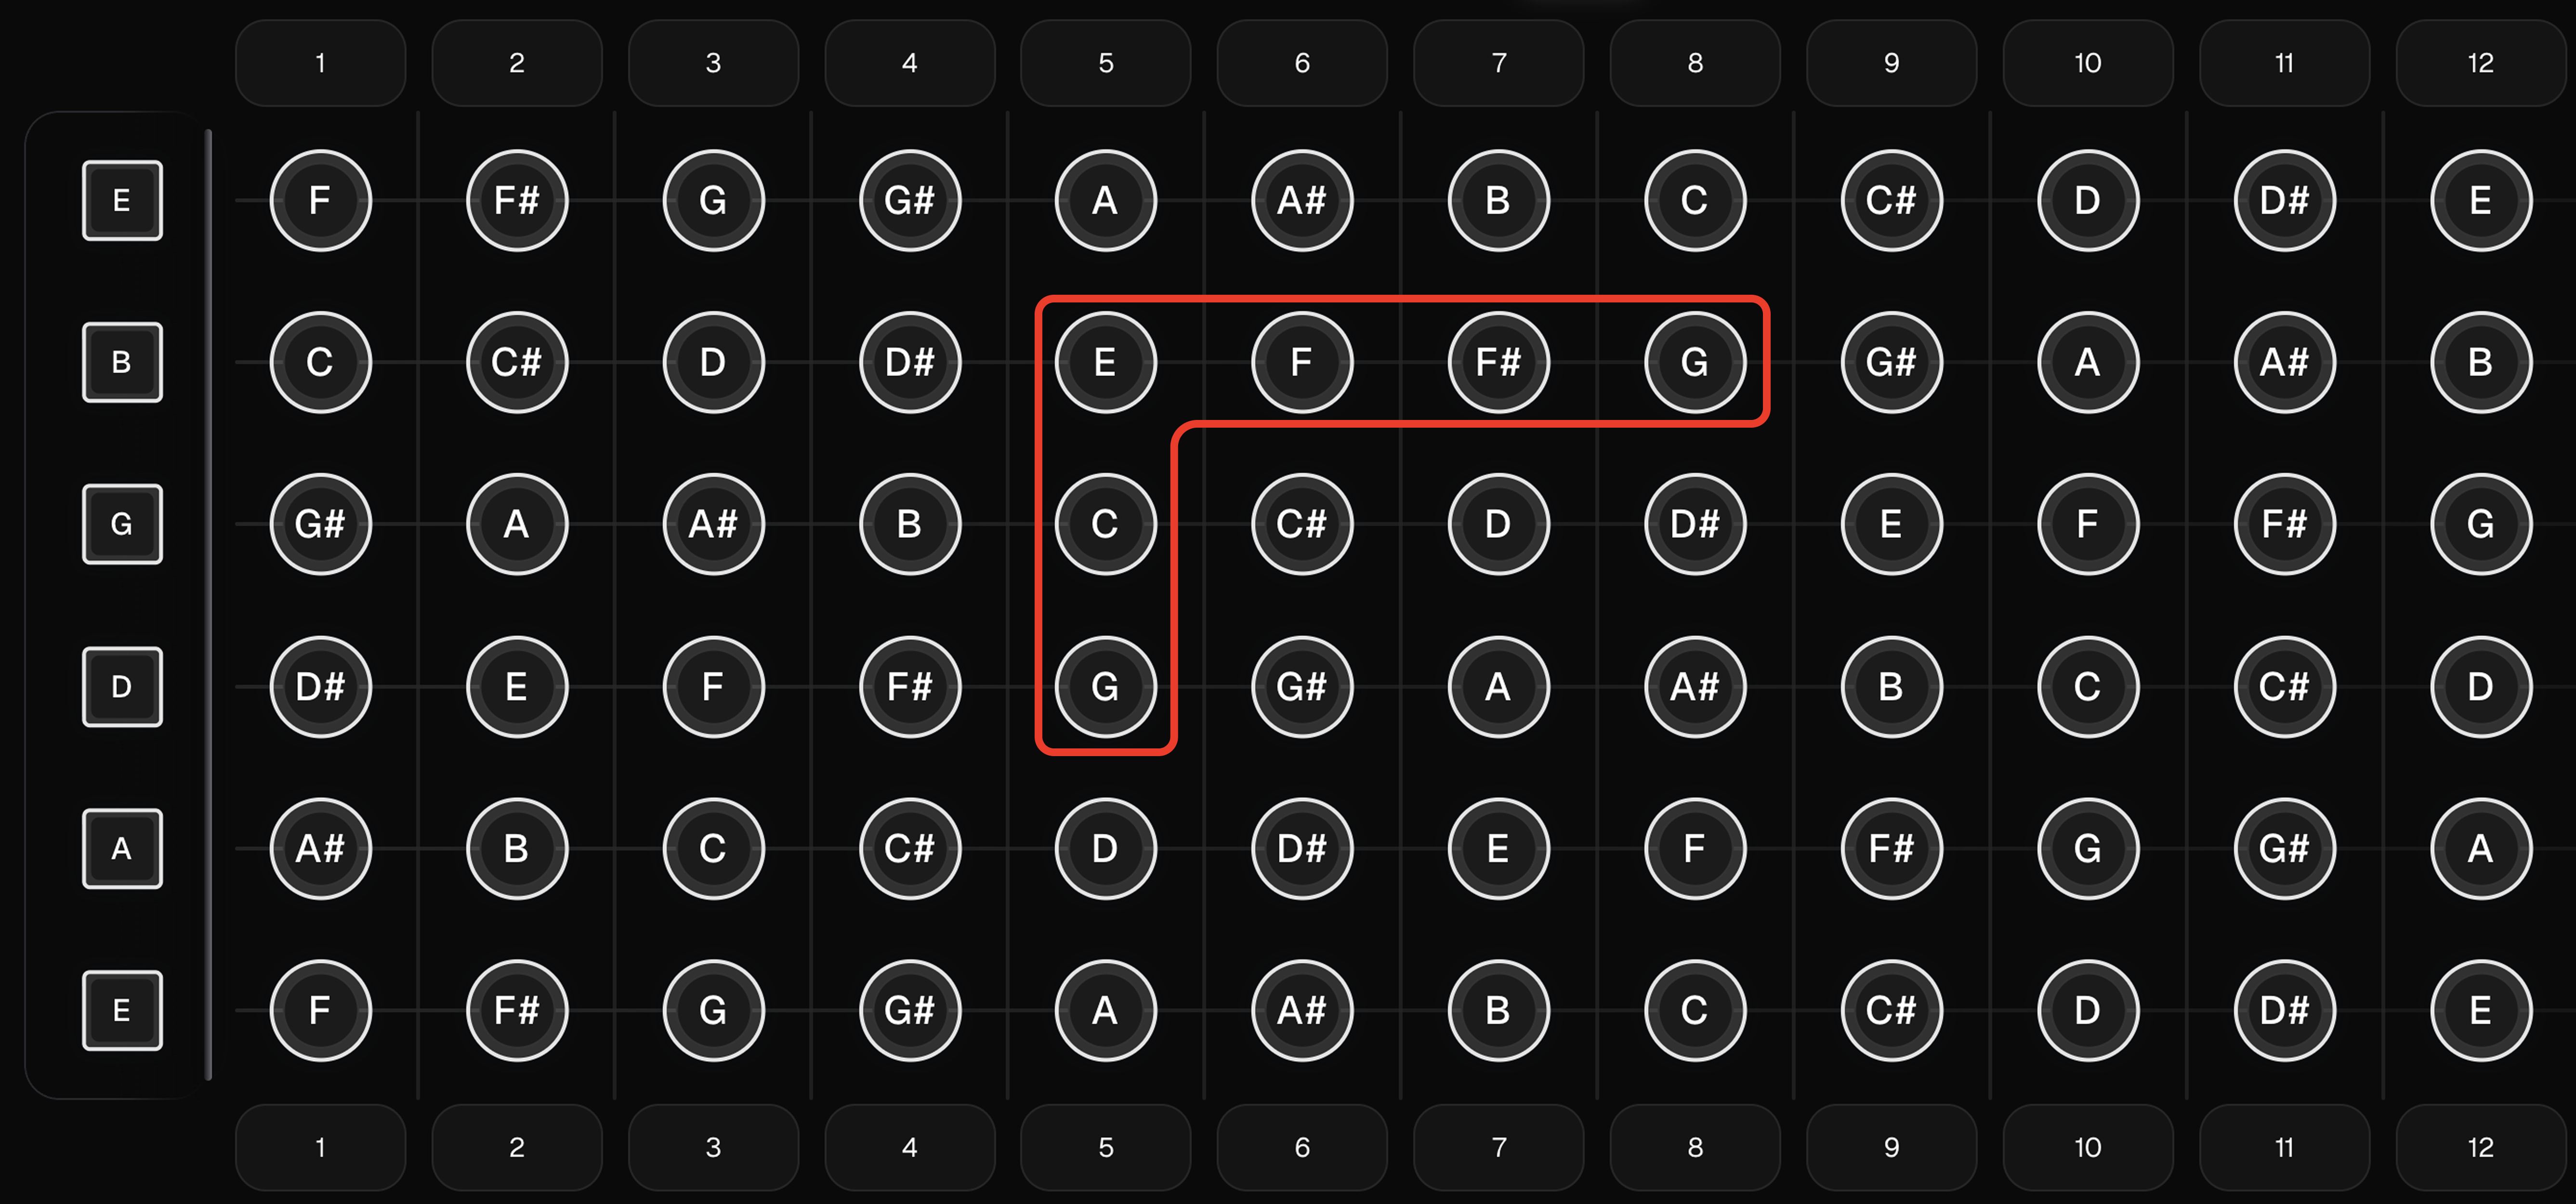
3) D → B String (B-String Shift)
Because the B string is tuned differently, the shape shifts.
Pattern: +3 strings, landing on the B string. Example: 5th fret D (G) → 8th fret B (G)
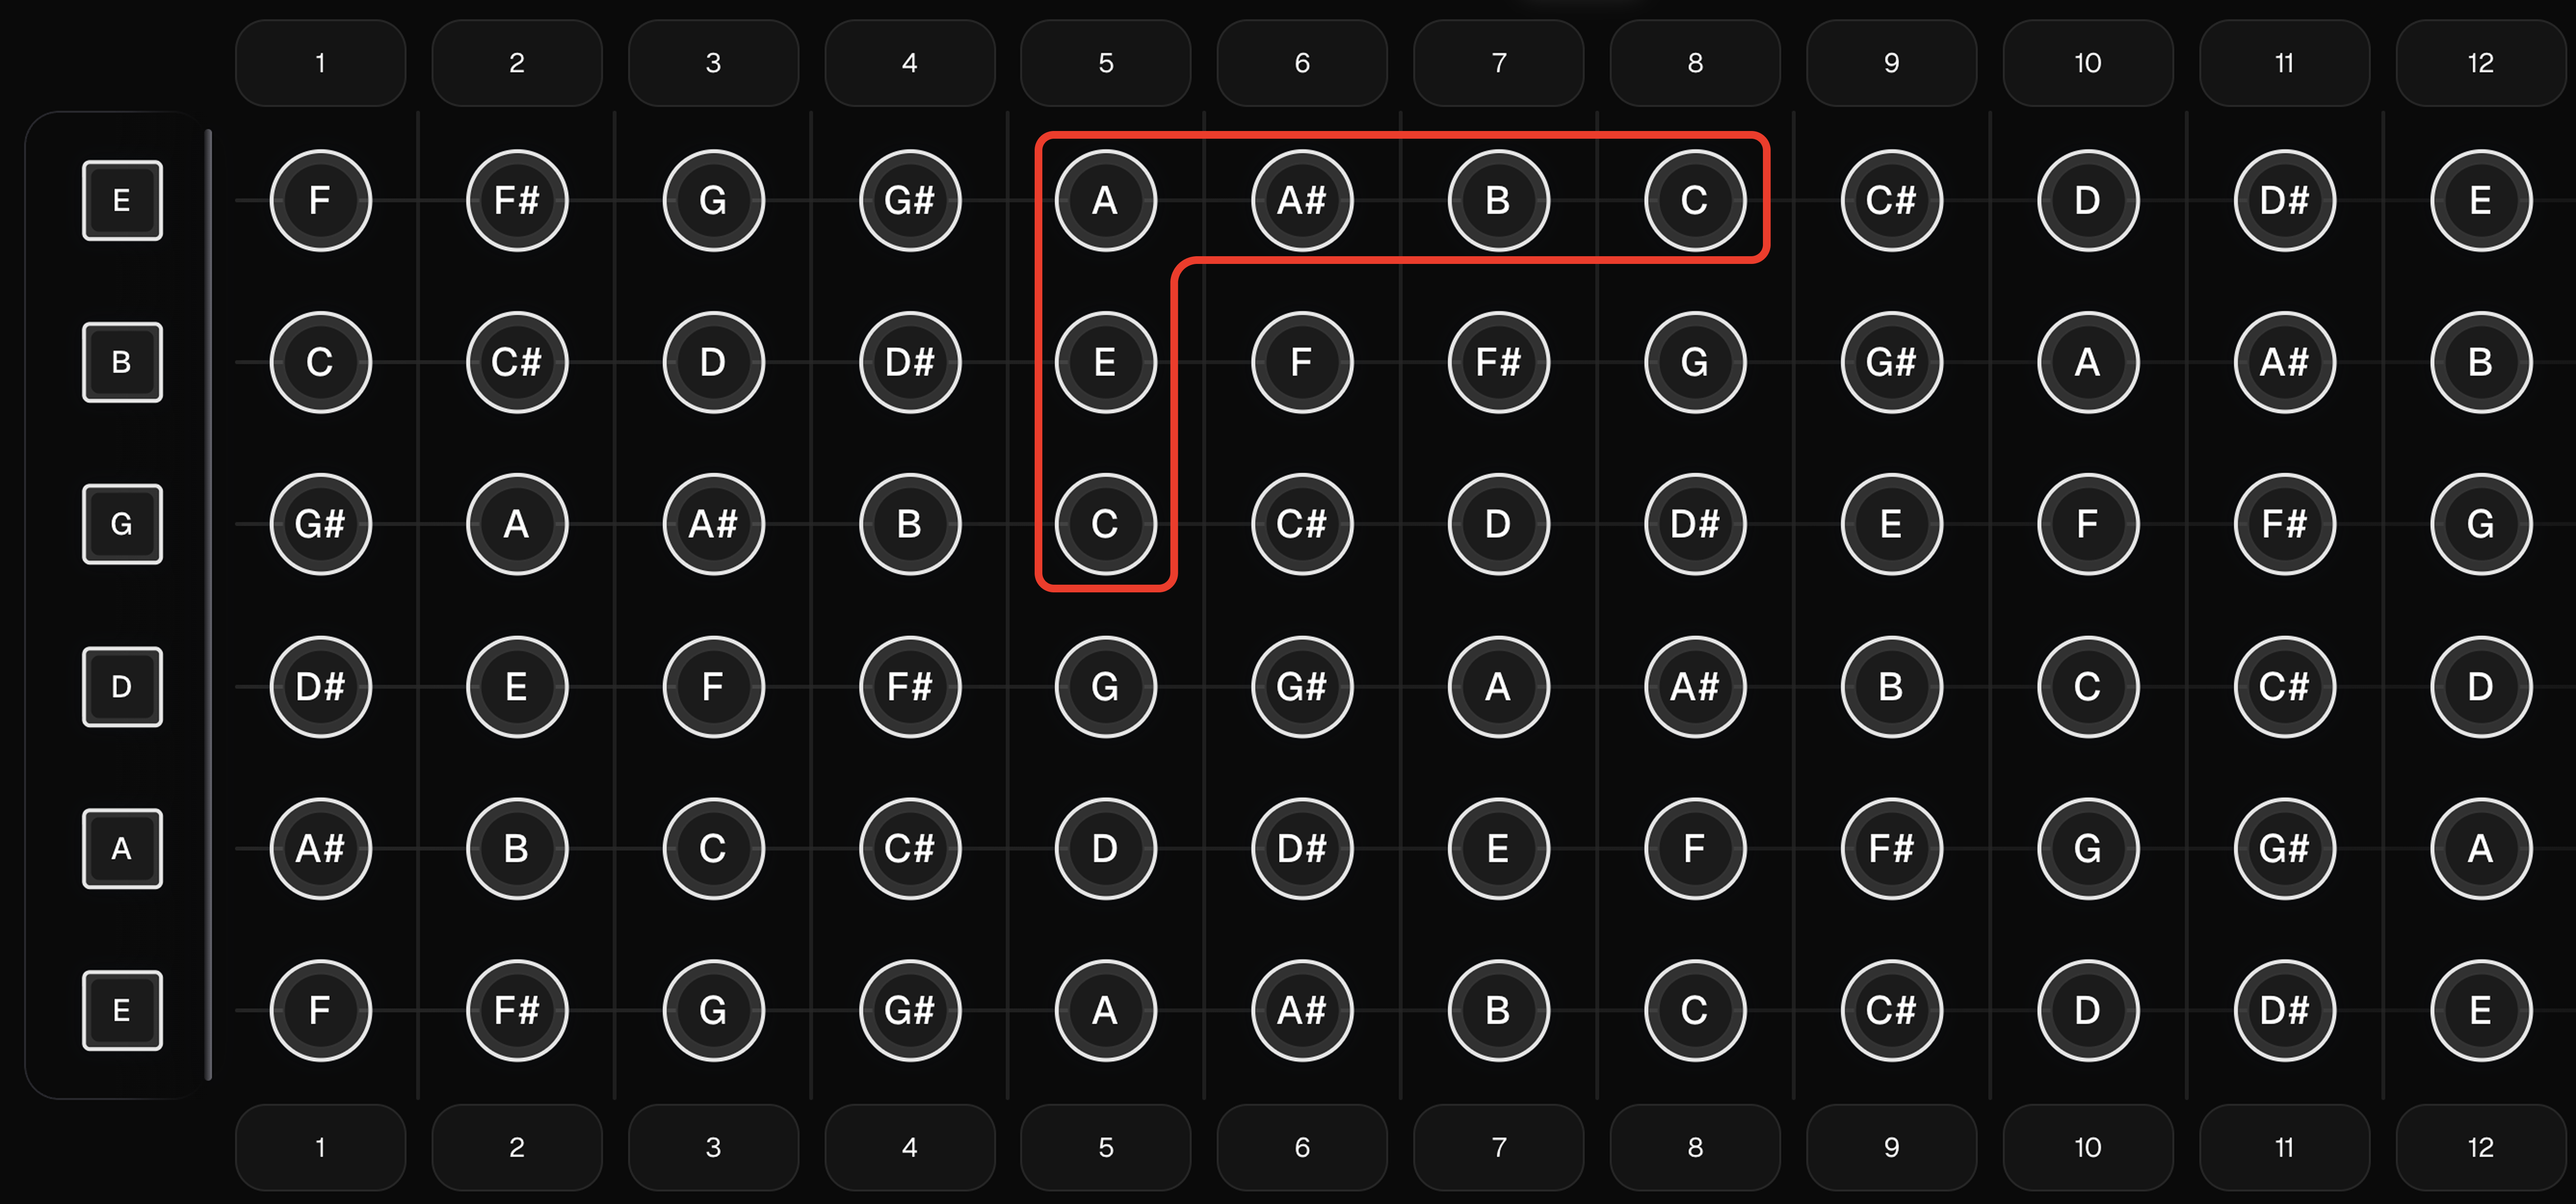
4) G → High E String
Also affected by the B-string tuning shift.
Pattern: +3 frets, +3 strings. Example: 5th fret G string (C) → 8th fret high E (C)
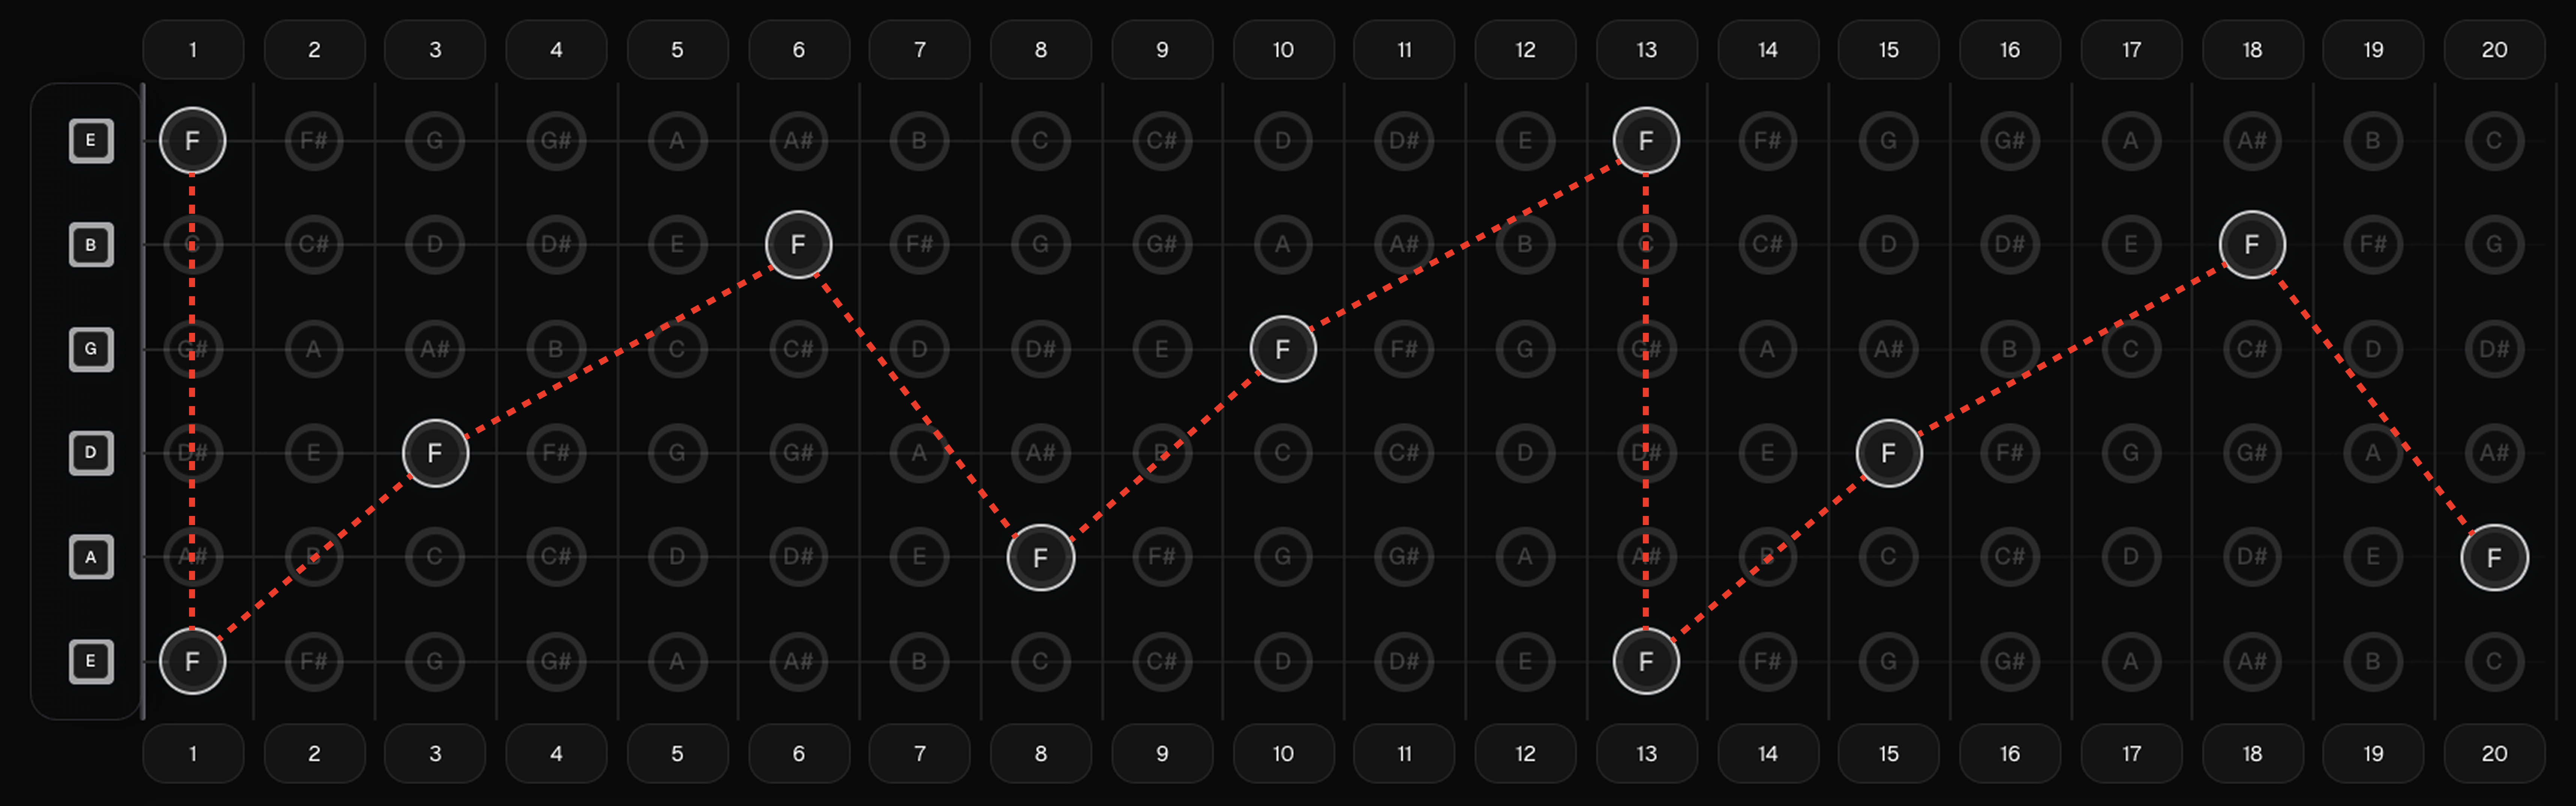
These shapes stack like a zig-zag, creating a repeatable map of every note across all six strings. It’s not “memorization”—it’s pattern recognition.
SoundGate’s Interactive Fretboard
Instead of guessing where notes connect, SoundGate’s Interactive Fretboard lets you see these patterns instantly. You can:
- Highlight any note across the neck.
- Visualize scales, chords, arpeggios, and intervals.
- Practice note identification interactively.
Try it now and use it as a visual “map” while you practice your daily drills.
Open the Interactive FretboardFinal Thoughts
Memorizing the fretboard isn’t a one-day project—it’s a skill that grows with consistent, low-pressure practice.
- Start with the natural notes on the Low E & A strings.
- Use the chromatic scale to fill in the rest.
- Lean on the 5 landmark frets as checkpoints.
- Understand how notes repeat across strings.
- Use octave shapes to connect the entire neck.
Give it a few minutes a day, and the fretboard will start to feel smaller, clearer, and more meaningful.